My son really wanted one of the mini NES when they were released, however he missed out.
I already knew that you could use a raspberry pi as an arcade emulator, so I thought why not build him one.
I grew up playing old arcade machines and still have a love of video games, so building this project for my son was a lot of fun.
I found a lot of people had already designed Mini NES cases for the raspberry pi, however I had a lot of trouble printing them due to the limitations of my 3D printer. I decided to modify an existing design to make it easier to print and remove some of the unwanted parts. It can be found on Thingiverse. http://www.thingiverse.com/thing:2180125

I have used Recalbox (https://www.recalbox.com/) as the operating system as I find it better than Retropie. Recalbox allows you load and manage your ROM’s via a web page and has emulators for just about everything (I love MAME and Galaga is my favourite). It supports many different controllers including Xbox One controllers (wired only, this is done by using a USB cable)
The power and reset buttons are both functional as is the led. Recalbox has a script built in that allows you to use a switch to start and stop the raspberry pi, the details can be found in this link (https://github.com/recalbox/recalbox-os/wiki/Add-a-start-stop-button-to-your-recalbox-(EN)), the LED is connected to the serial port TX pin so that it gives you a real power indication light.
Both buttons are 12mm square tactile push buttons, wiring for the power button is per the Recalbox wiki page linked above. The 3mm LED is wired between a ground pin and the UART_TxD pin using the appropriate size resistor for the LED.

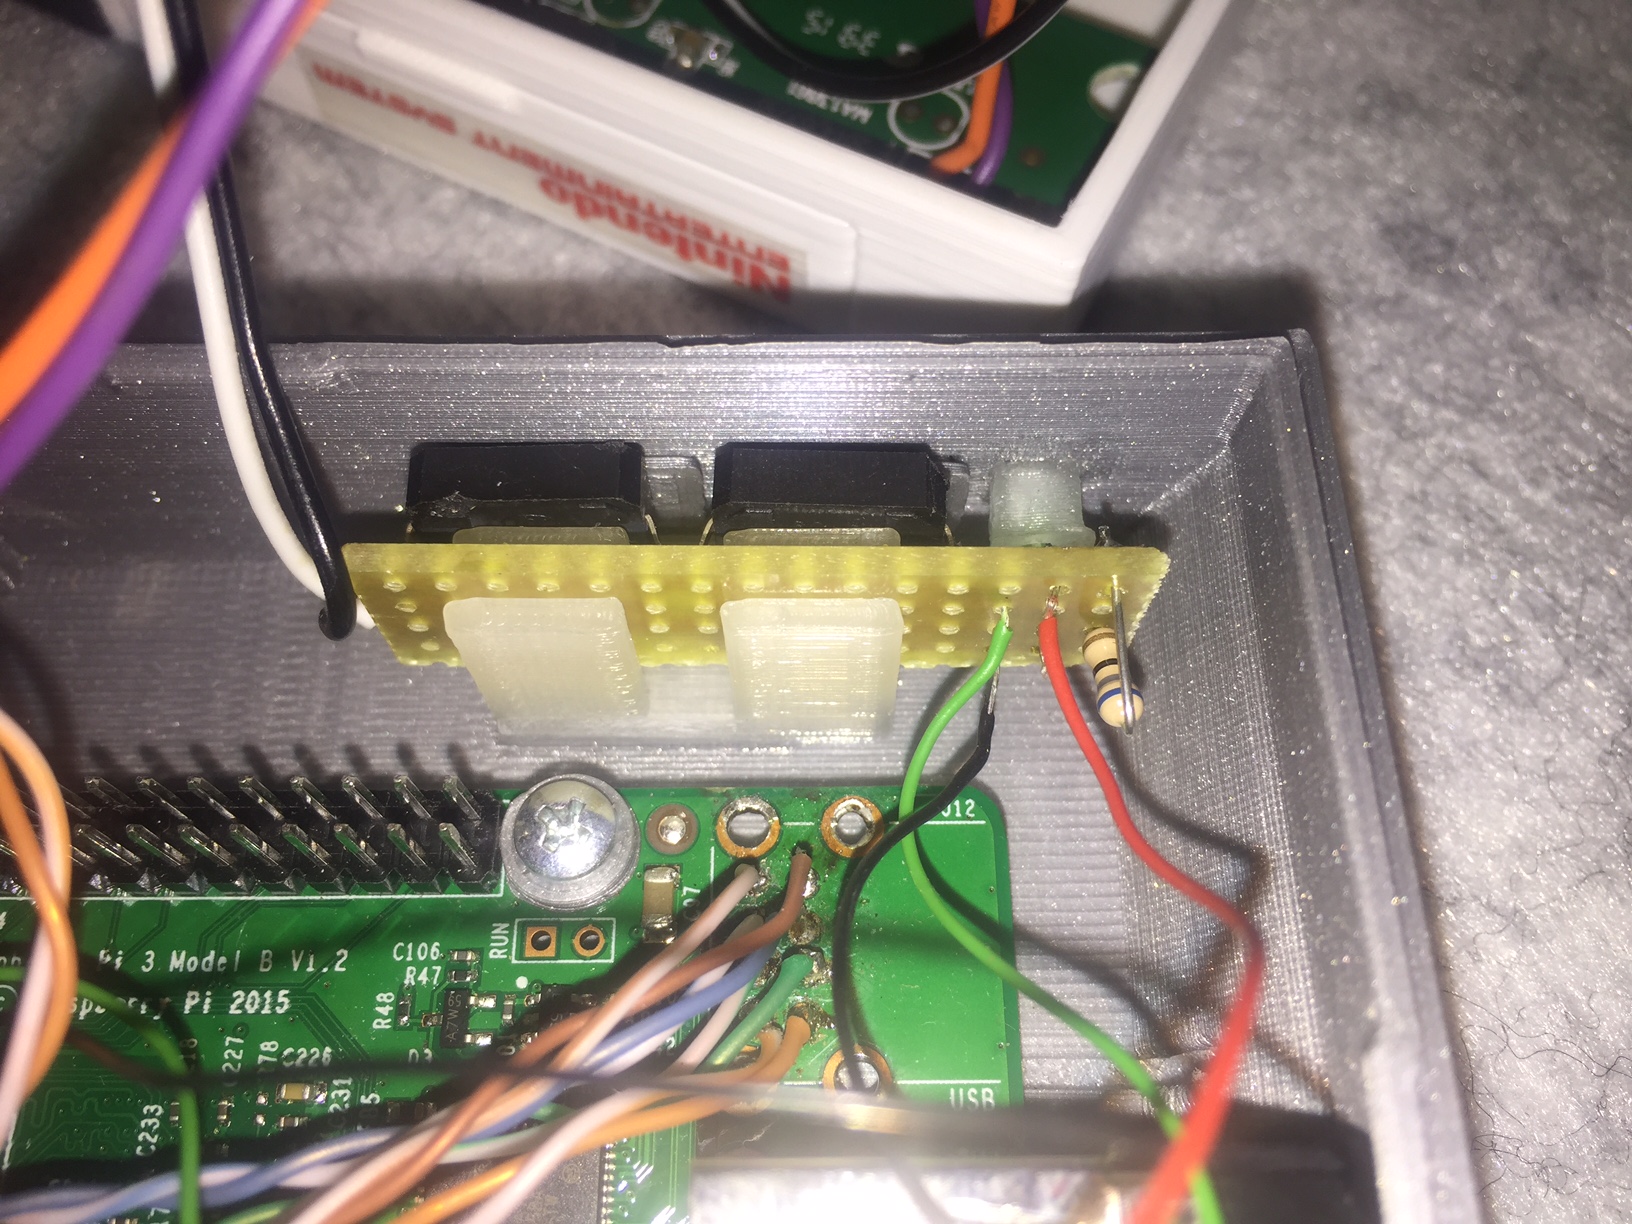
The LED will light up when the Pi gets power, flicker a bit while it boots up and then stay on solid. At shutdown it will go off when it's safe to remove power.
The reset button is actually the "ESC" key on a keyboard, I have used the circuit board from an old keyboard and wired the switch across the "ESC" key contacts (in my case it was a wireless keyboard, but any should work).
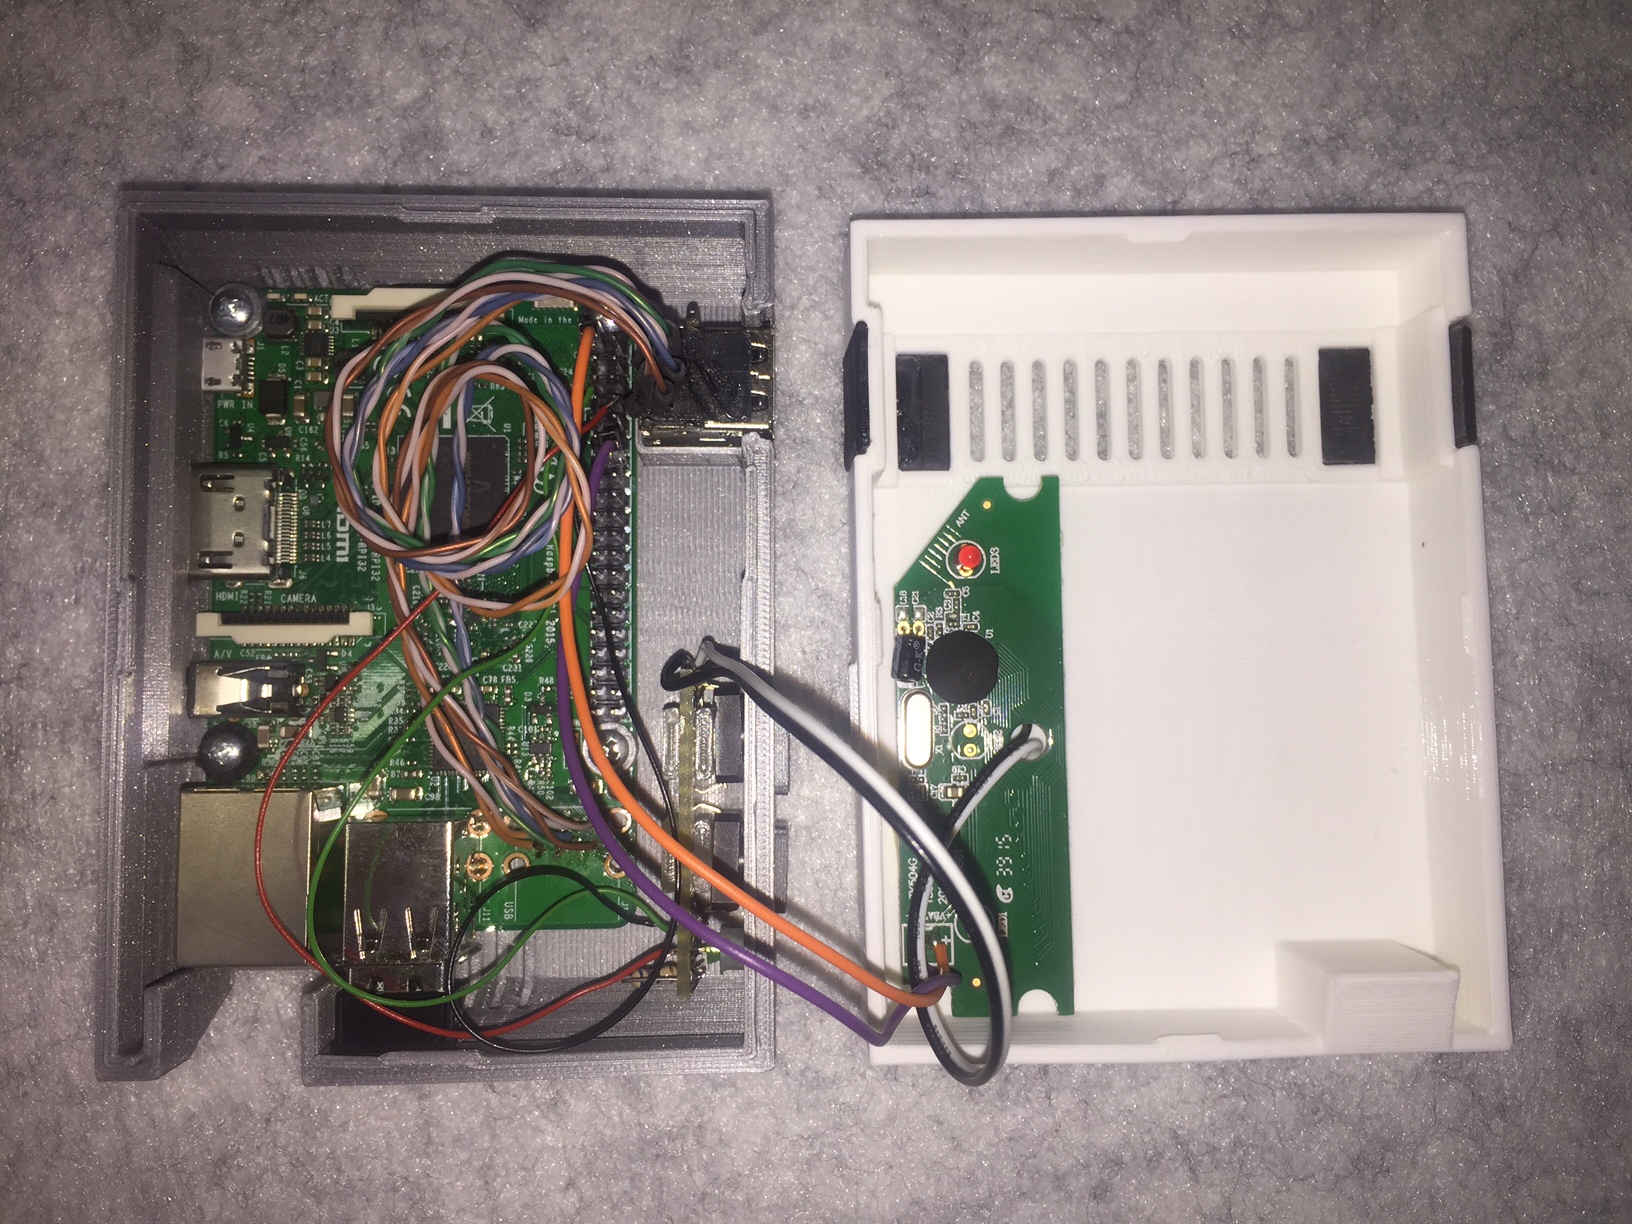
The USB ports for the controller connections were removed from the PI and then the wires extended. I would not recomend doing this unless you have the correct equipment and experience, the PI PCB has been soldered using lead free solder which makes it very difficult to un-solder. I would recomend purchasing a dual usb PCB mount socket and adding a usb plug to it.
The labels were created using clear inkjet printer labels, the font is called Pretendo, which is copy of the orginal.
If you want to go further follow this link to daftmike’s web page http://www.daftmike.com/2016/07/NESPi.html, he uses NFC tags and a reader to recreate a working NES with cartridges.
All you need to do is put it all together and then load up some ROM's and enjoy.

