Welcome to our tutorial for using NOOBS (New-Out-Of-Box-Software) to install an OS (Operating System) for use with your Raspberry Pi. The NOOBS package includes access to seven popular Operating Systems:
- Raspbian
- Windows 10 IoT Core
- OpenELEC
- OSMC
- Arch Linux
- Pidora
- RISC OS
Prepare The microSD
For this tutorial, we’ll be working with the Raspberry Pi 3 Model B and Raspbian. Bear in mind though, the procedure is practically identical for all boards.
With the Raspberry Pi, there is no onboard storage for data or Operating Systems, all of this is stored on an SD card in the onboard Micro SD card slot. So we need a way to install one of this Operating Systems onto our SD card for use with the Raspberry Pi.
This is where NOOBS comes in. It’s an installation manager for the supported OS packages which makes it really straightforward to get it up and running.
There are two options to get started with NOOBS:
- Purchase a Raspberry Pi NOOBS MicroSD card which comes with NOOBS preinstalled for easy installation.
- Use freshly formatted MicroSD card (class 4 or above and 4GB ) and copy NOOBS onto it. To do this, visit our tutorial for Creating a NOOBS SD card.
Got a MicroSD card with NOOBS on it? Awesome! Let’s proceed.
Power Up Your Raspberry Pi
As detailed in our Hello World, with Raspberry Pi 3 tutorial, connect up your keyboard/mouse and display, insert your NOOBS SD card into your Raspberry Pi, then connect the Micro-USB power supply to turn it on.
Install The Operating System
Whilst the NOOBS package includes access to 7 different Operating Systems, Raspbian is the only one that comes pre-loaded with NOOBS. If you connect your Raspberry Pi to the internet using the Ethernet port, NOOBS will display the other OS options, which will be downloaded over the network. Today though, we will be focusing on Raspbian.
- If you’re using a MicroSD card that came with NOOBS preinstalled on it, Raspbian may already be preinstalled and set up on your card. If so, you can boot straight into Raspbian and skip ahead to the ‘raspi-config’ step.
Power Up your Raspberry Pi
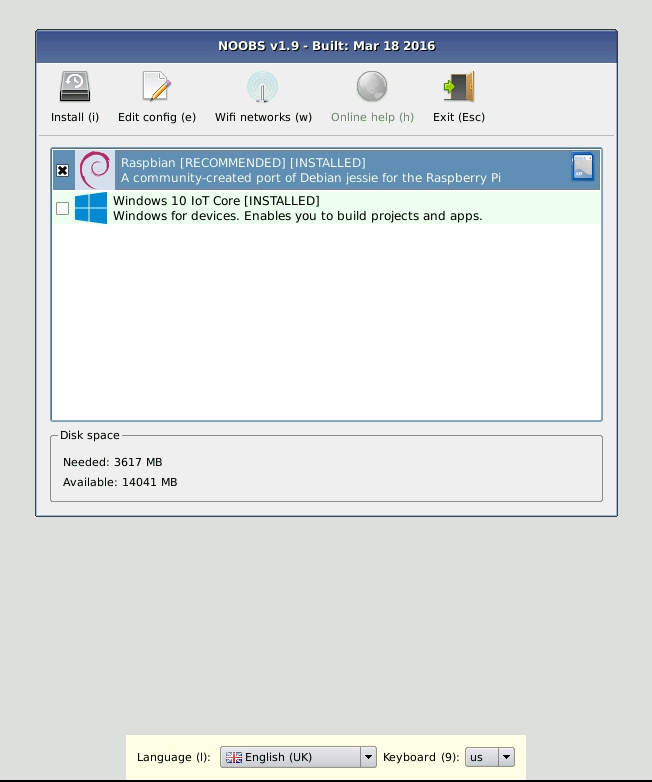
When you first power up your Raspberry Pi with NOOBS you should see a black screen with text displayed briefly, followed by a grey background with the Raspberry Pi logo. A few setup boxes will appear. Let them do their thing until you see one saying ‘Please wait while NOOBS initialises’. You might see something different, just hold onto your hat and let it load up. Eventually, you will be prompted for some input (see below).
After a few seconds, it should disappear and you’ll be left with the NOOBS installation management screen.
Optional Step
Watch cat videos while you wait.
Last Step!
If all is well, your Raspberry Pi should restart, and boot into Raspbian. Congratulations! You now have a functional desktop microcomputer!

