Demonstrated here are two metallic finishes, that you can do to any 3D print, that will astound your friends and family when you tell them 'It was actually 3D printed and these are not metal at all'. These finishes are perfect to use for costume design and cosplay particularly as the final weight of your object will be much less than if it were made from metal (and thus much easier to carry). In this guide is the processes I go through to make 3D prints look like metals, one is a raw iron colour with metallic sparkles and the other is a Silver Chrome finish. If your looking for a gold effect I would 100% recommend using gold leaf as other gold finishes never quite get the right glint.
This guide will go through the post-processing of models created from Ultimaker Tough PLA and Ultimaker Pearl PLA Filament from an Ultimaker 3D Printer and then finishing them in two different ways. The contents of this guide can be seen below.
- Before and After
- What You Need
- Initial Post-Processing
- Iron Finish
- Chrome Finish
- Download STL Files
A guide worth checking out if you dig this is Create Fantastic Finishes on 3D Printed Components. For a great guide to refine the settings for your 3D printer check out the guide Improving 3D Printed Models and if your running into issues with first layer adhesion check out the guide Printing Perfect First Layers.
As always if you have any questions, queries or things to add please let us know your thoughts!
Before and After
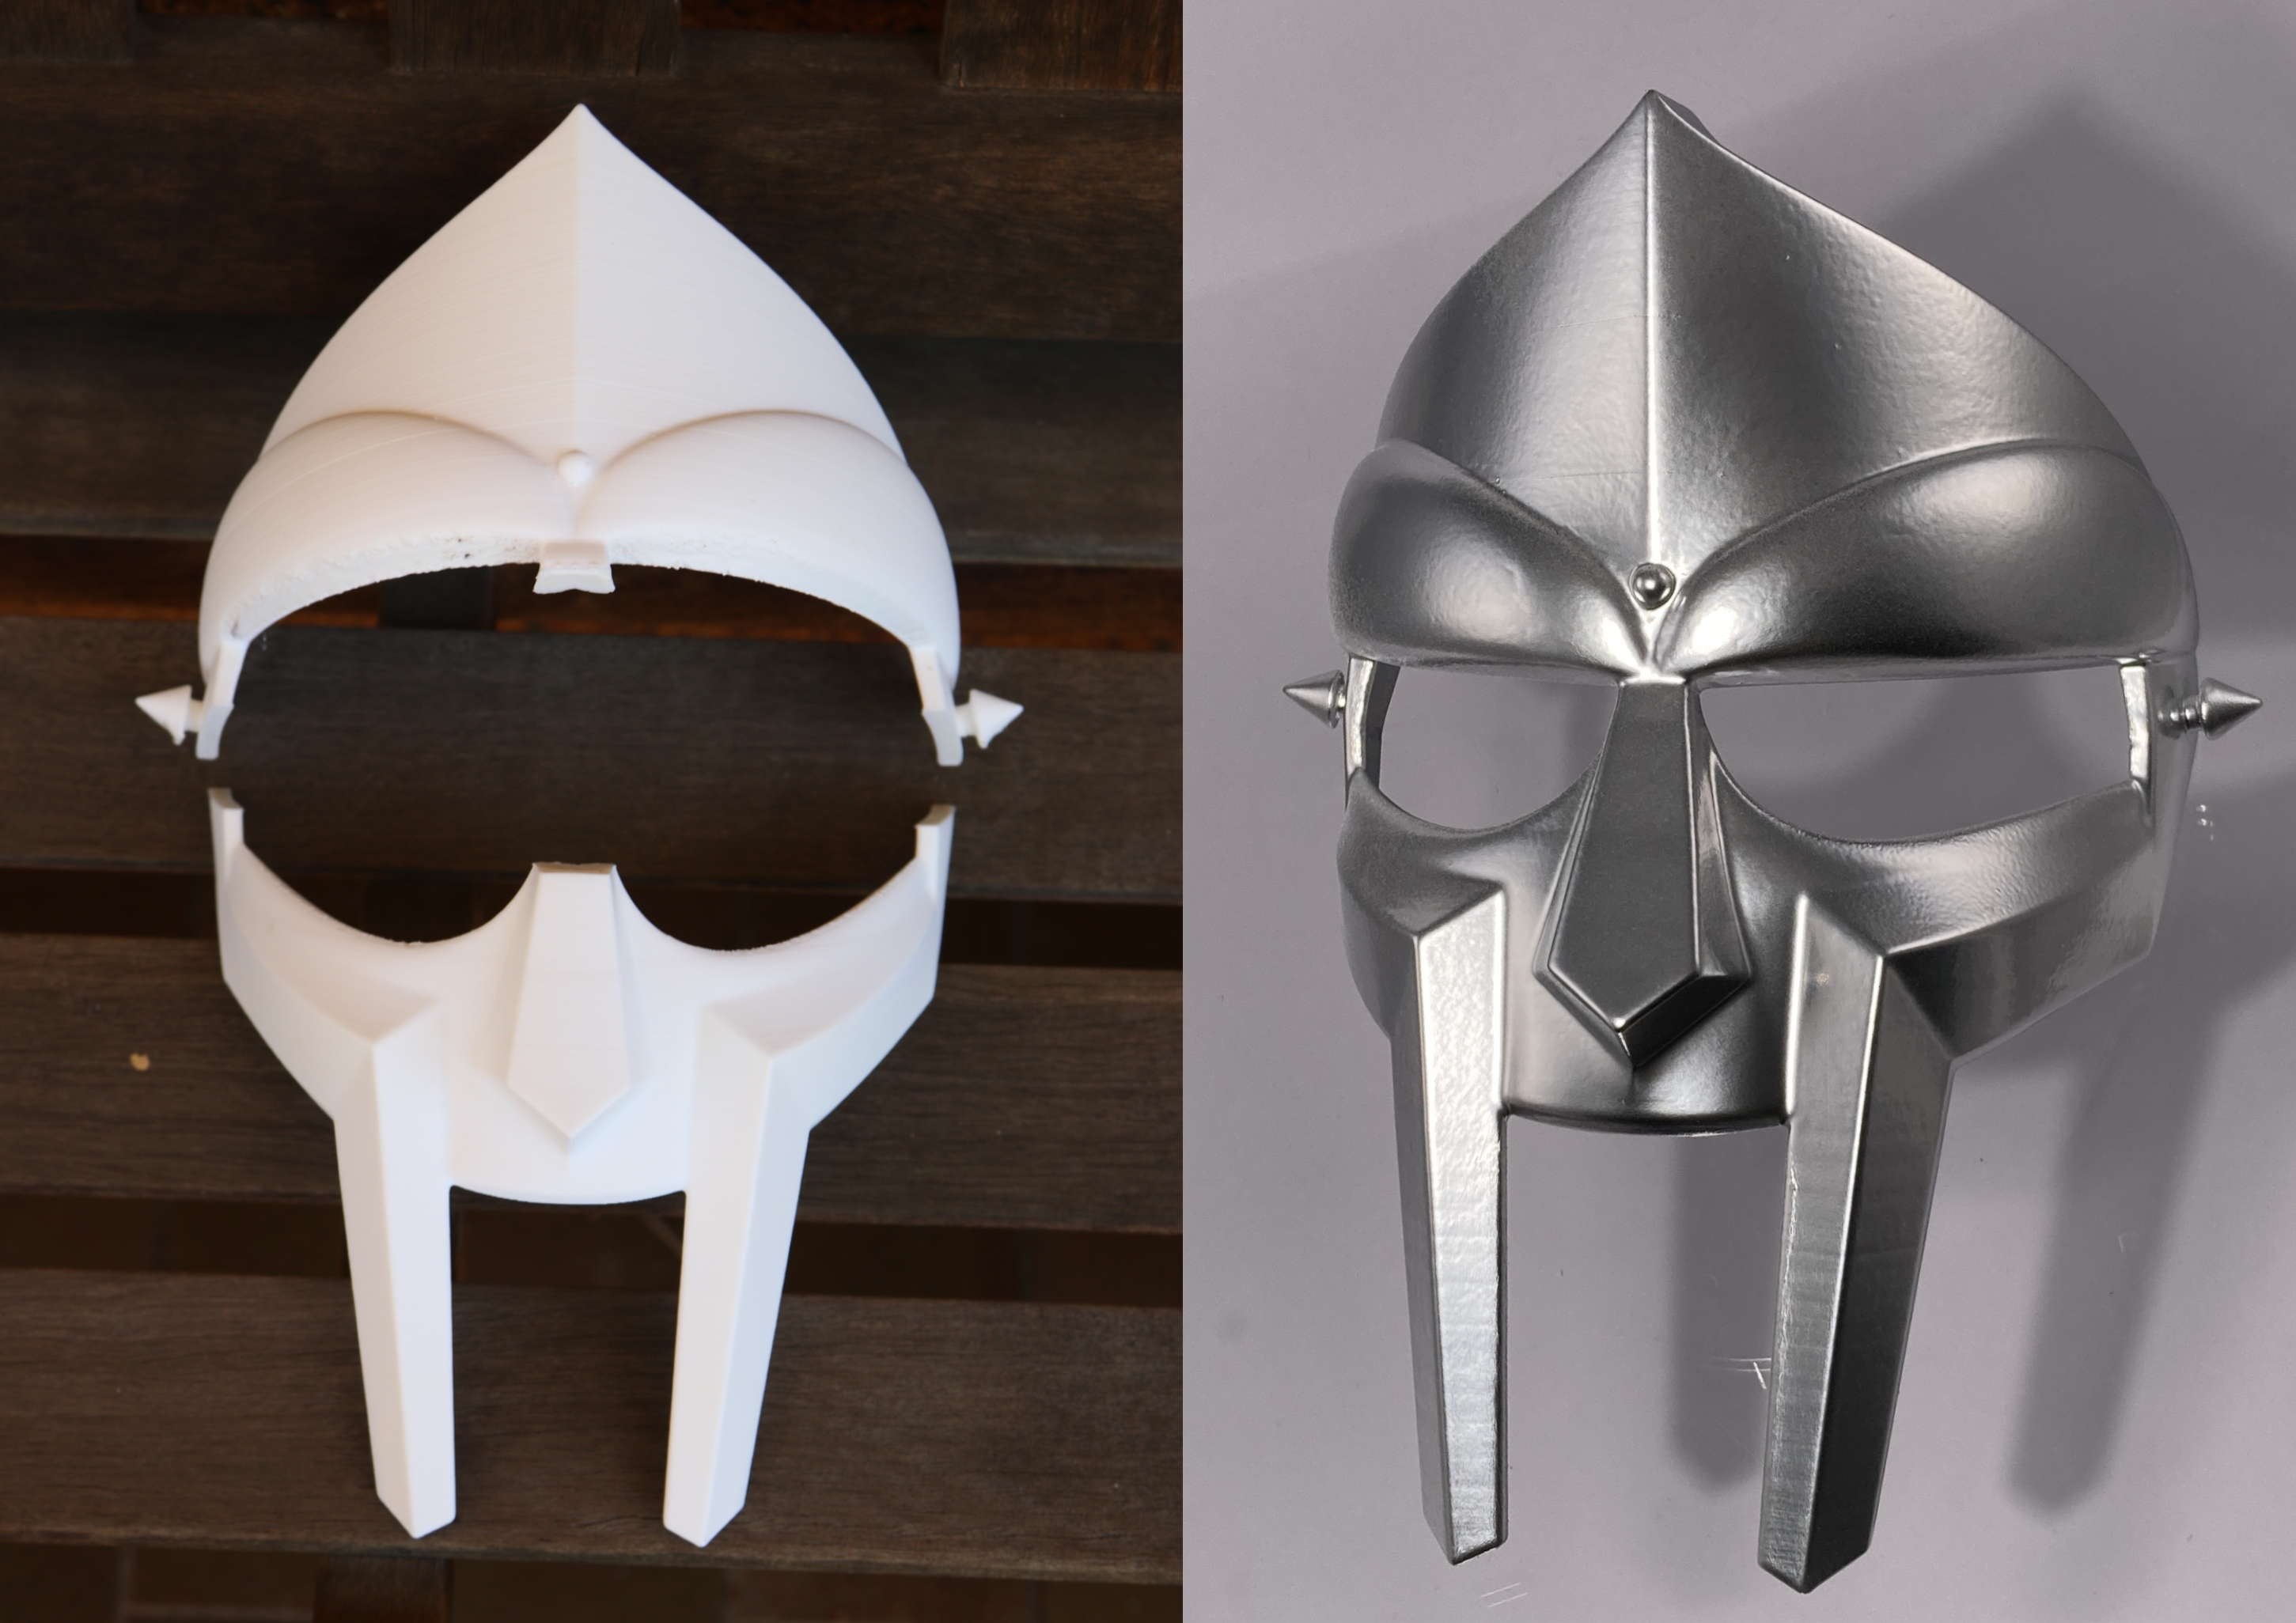
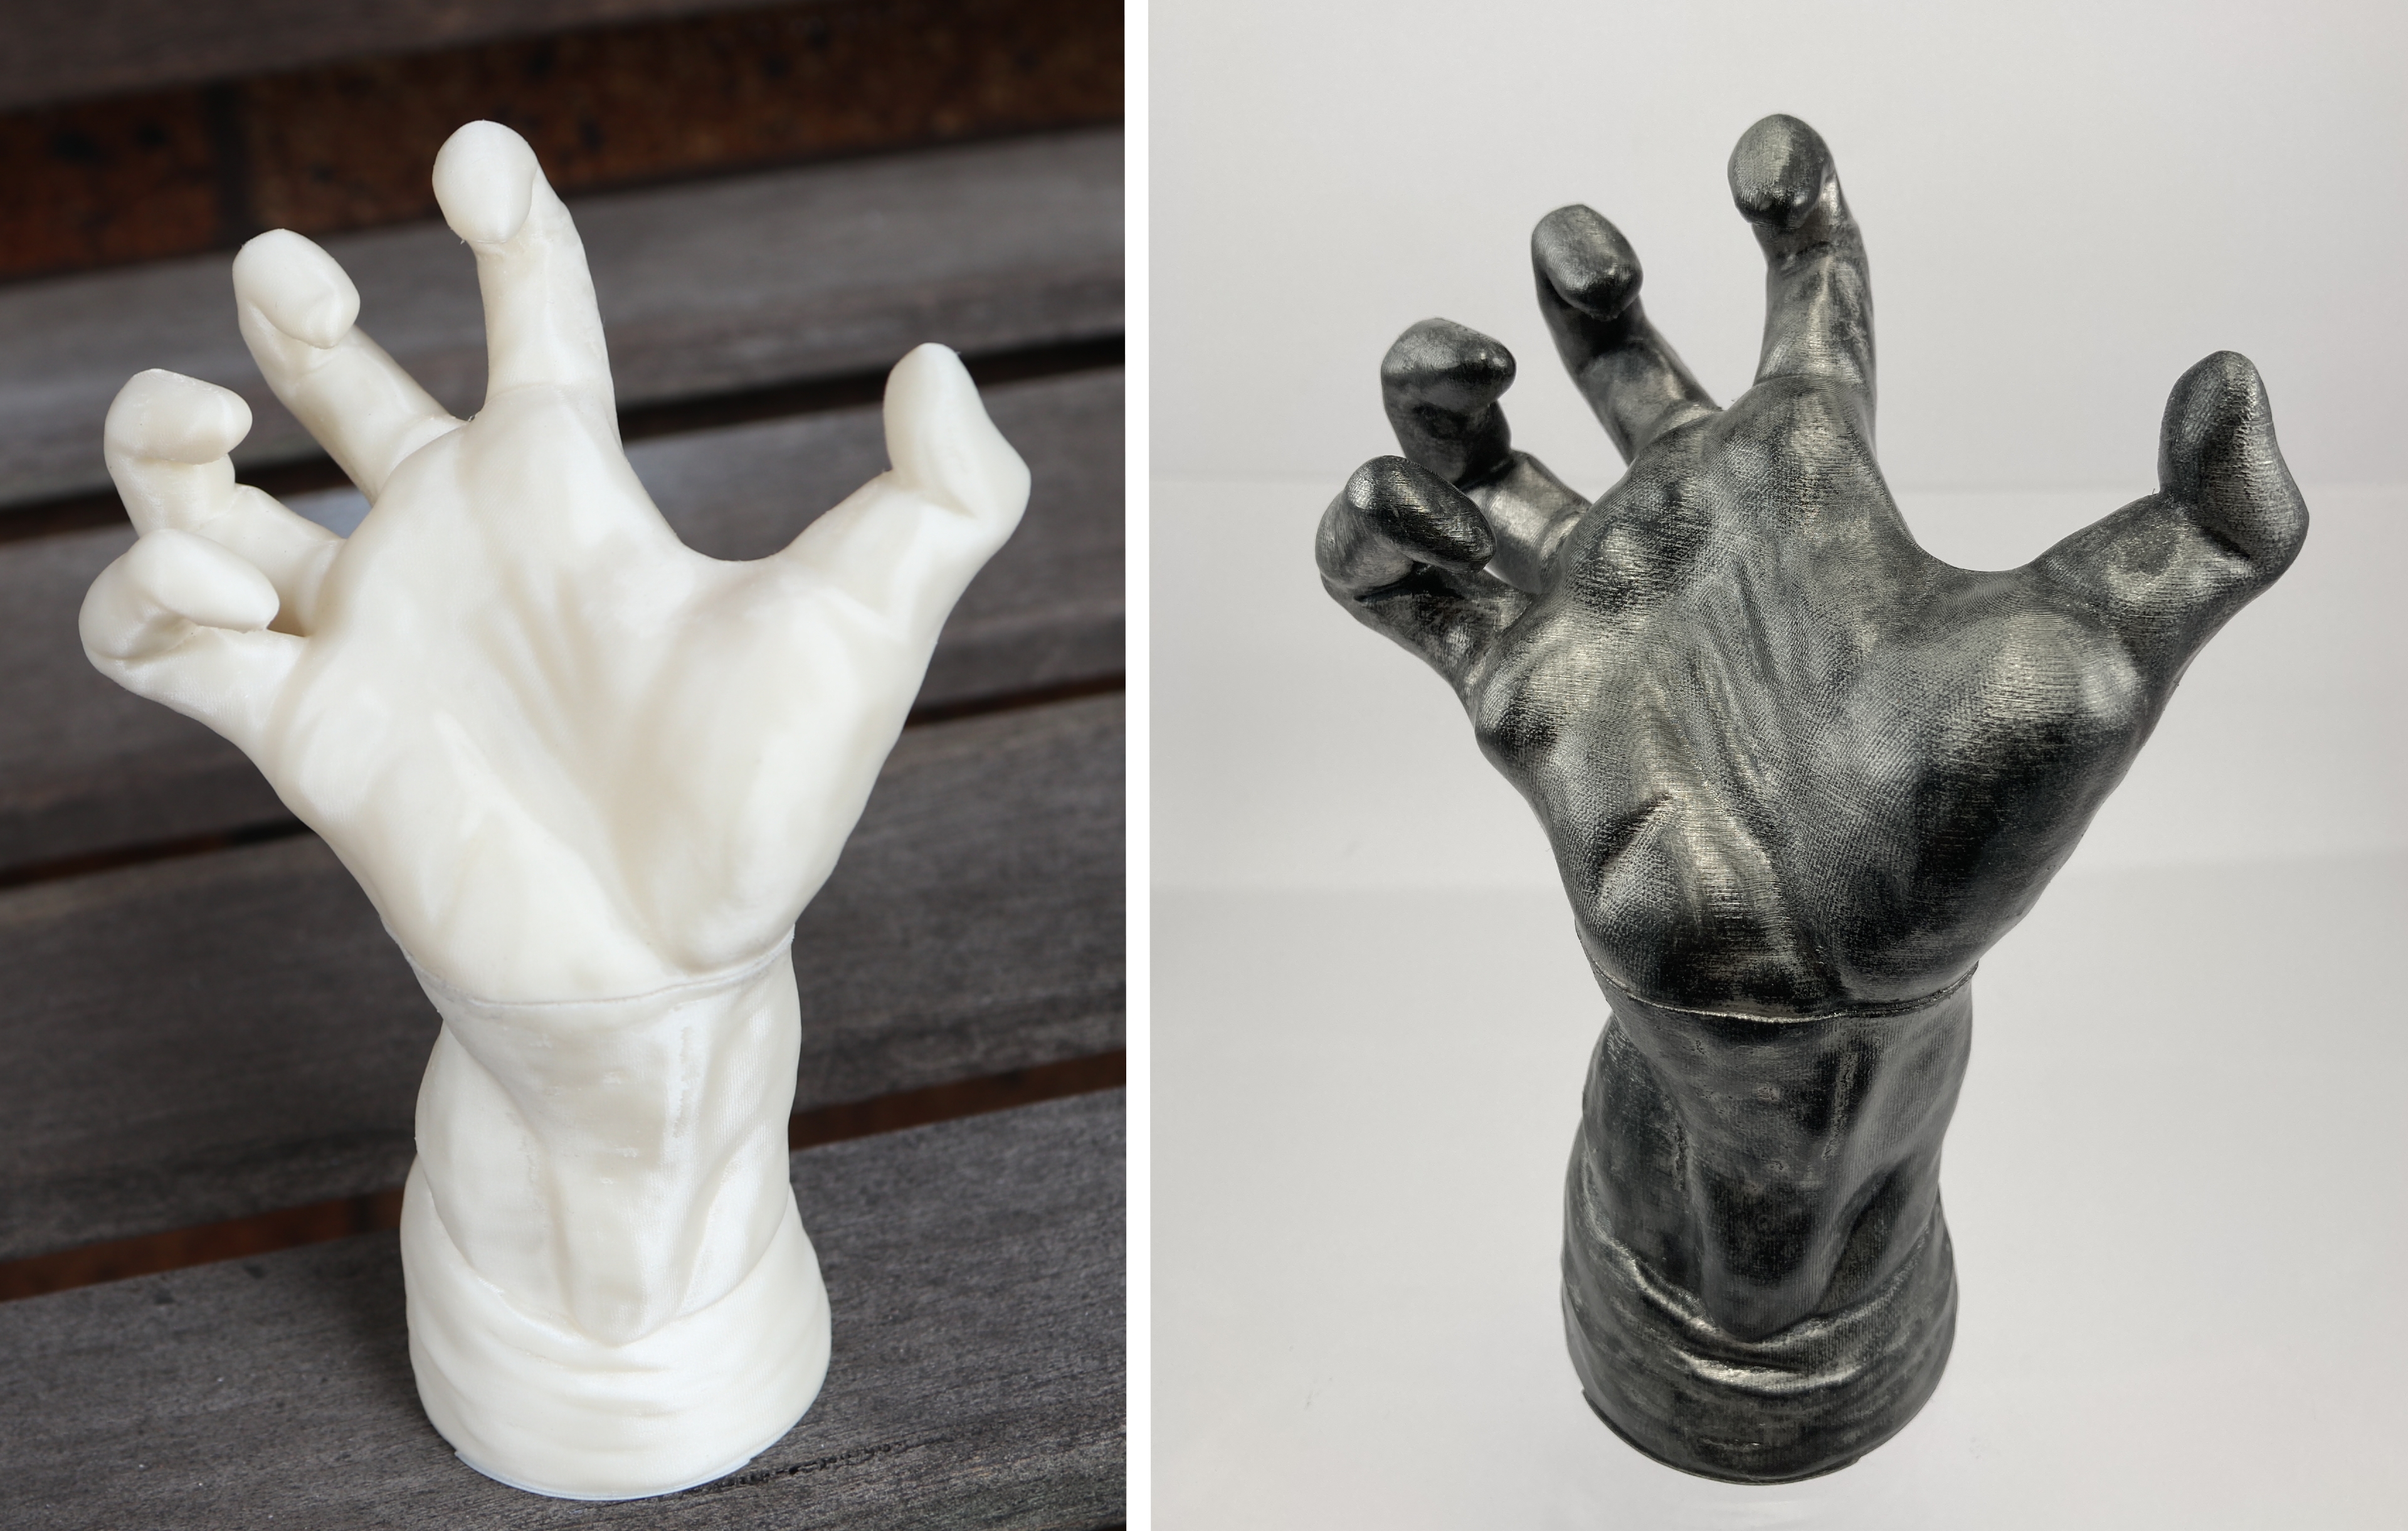
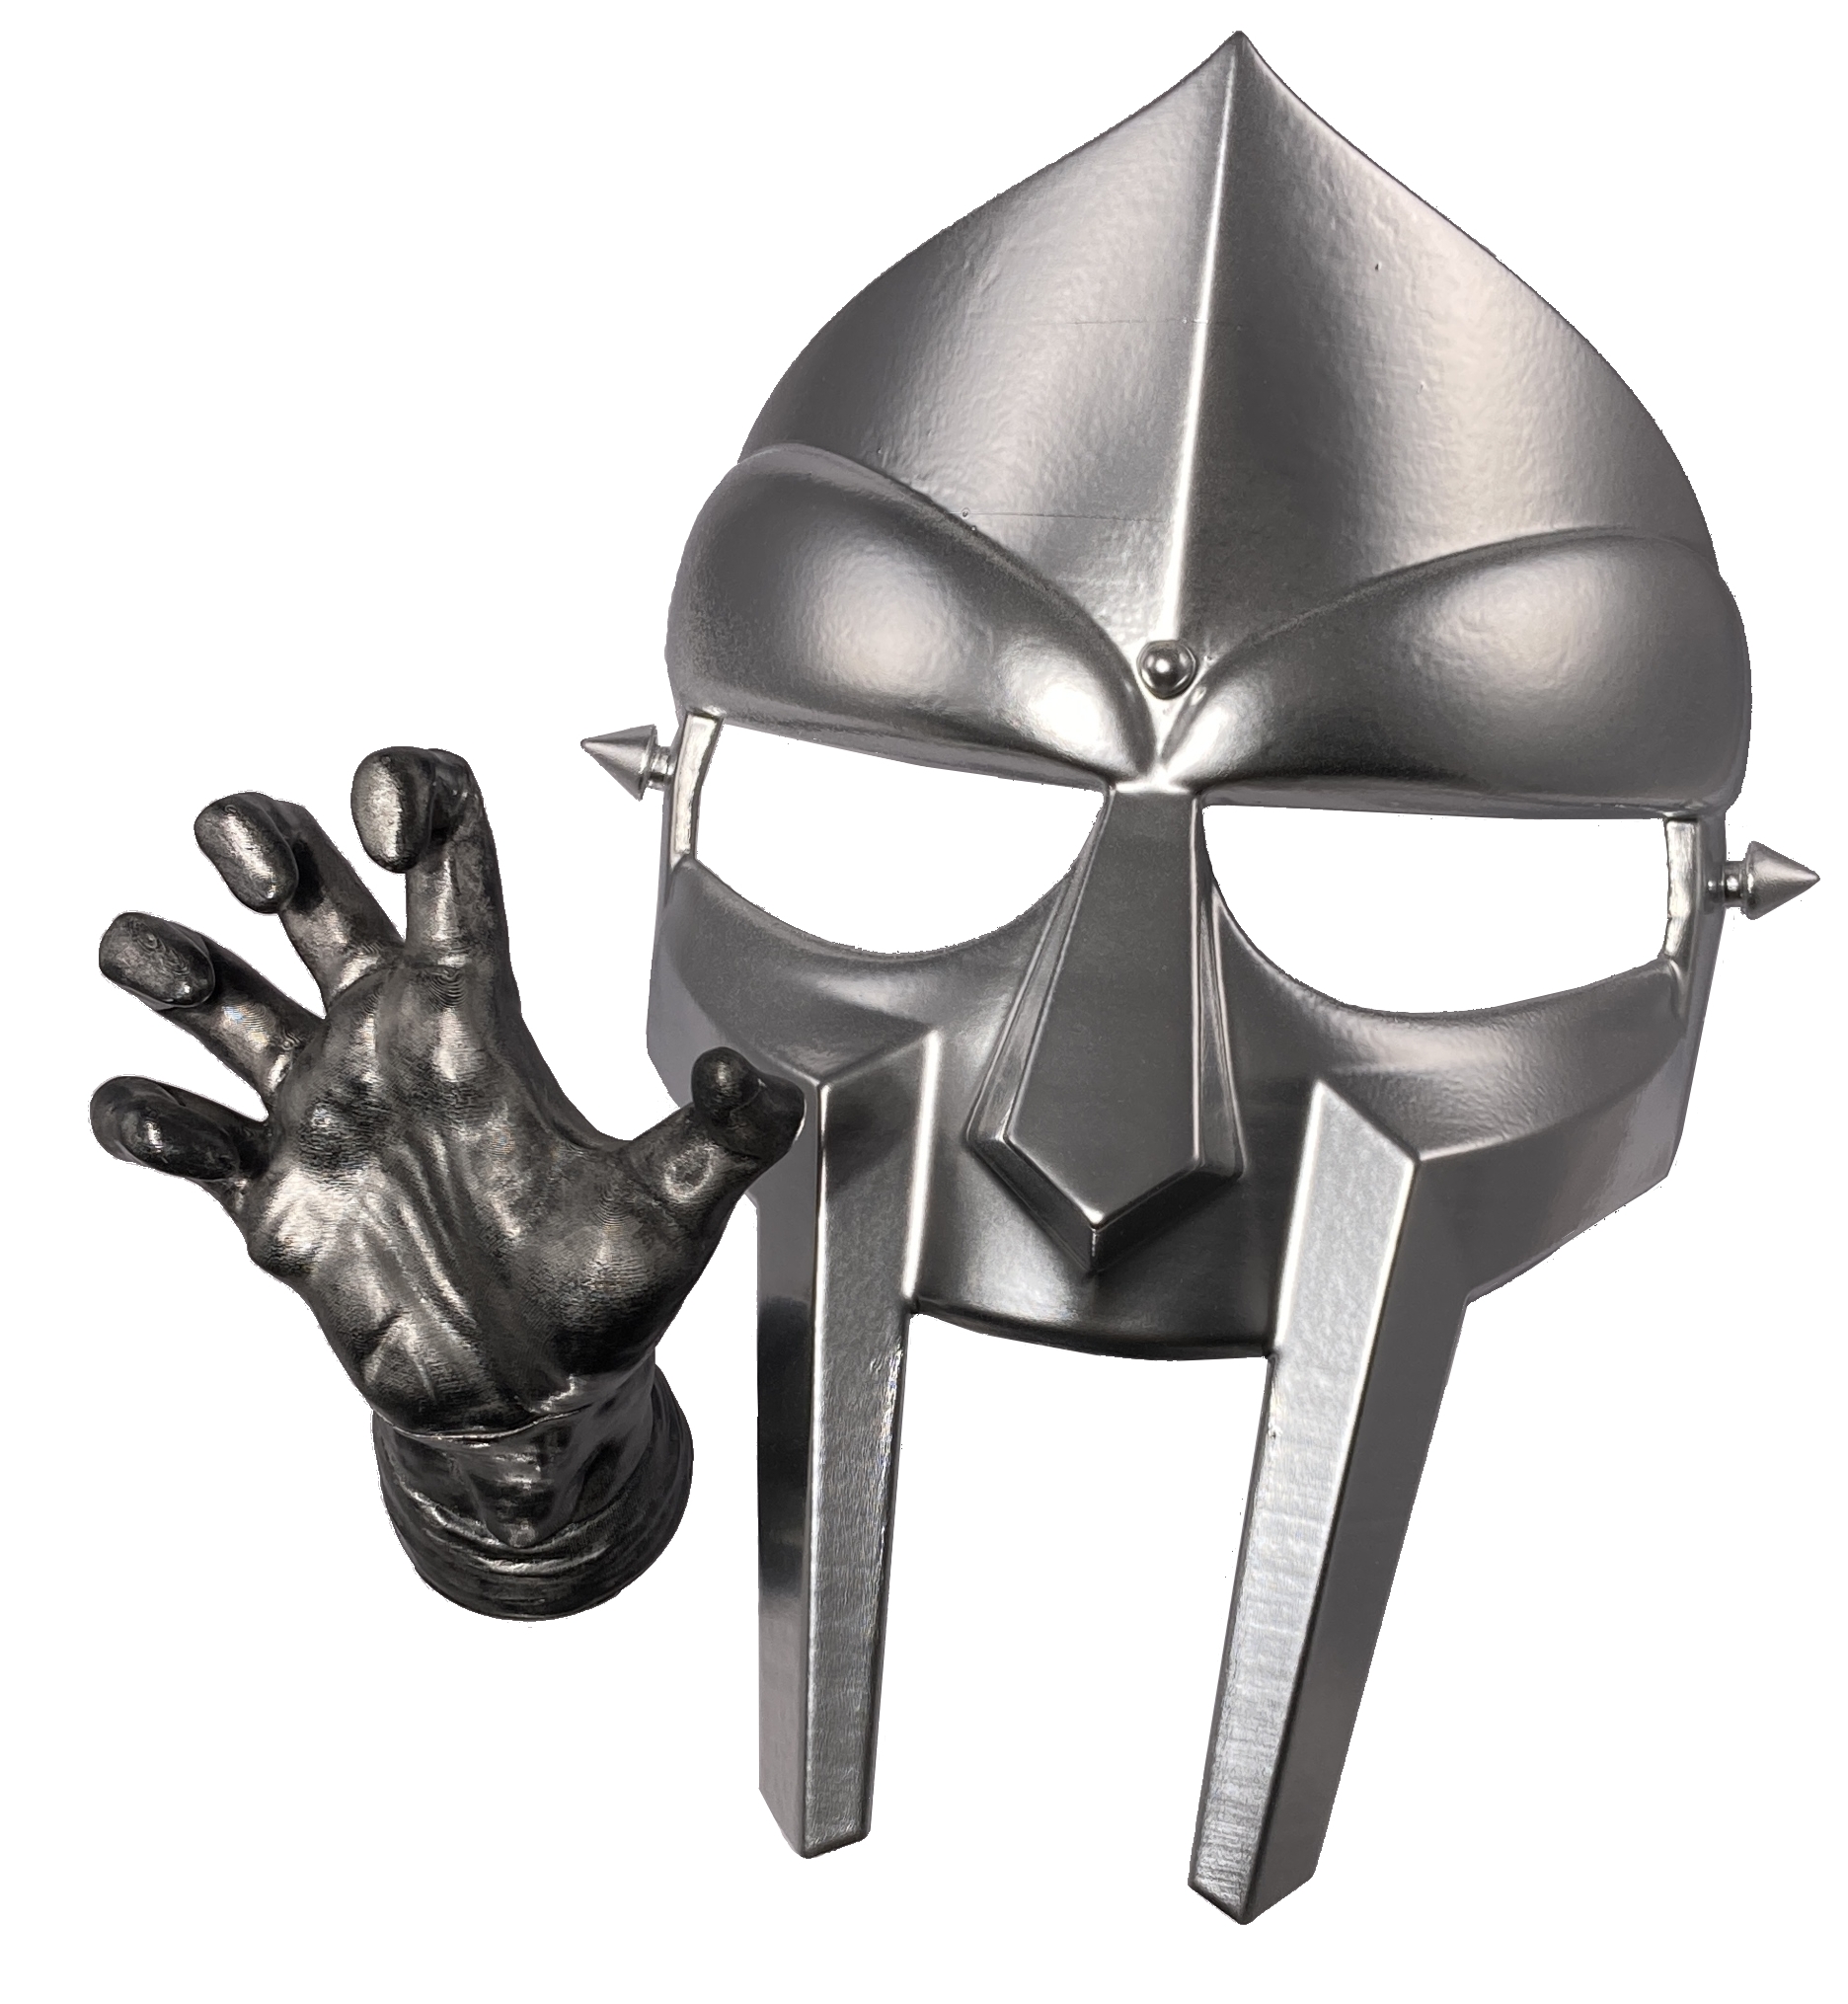
Now most importantly is the before and after shots, so here they are. Below you can see them for a 3D printed mask and a 3D printed hand sculpture. The STL files for these models can be found at the bottom of this page if you want to have a go printing them yourselves. Also, if you don't have a 3D printer we have 3D Printing Services that you can use to get your designs sent directly to you and into your hands.
What You Need
Below are the tools and supplies that you will need for both Metallic Finishes as they both require similar Post Processing. You can also see most of these tools and supplies in the image further below.
- 280 and 400 Sandpaper (The More the Better, Nothing worse than running out)
- Superglue
- Mask
- Wood Putty Filler
- Prime and Putty all in One Repair Spray
- Gloves

For the Iron Finish, I use the following tools and supplies. You can also see most of these tools and supplies in the image further below.
- Pearl Ex Pigment Silver
- Transparent Spray Paint
- Paint and Prime Black Spray Paint
- Silver Leaf Rub 'n Buff
- Small Paint Brush
- Gloves and Definitely a Mask
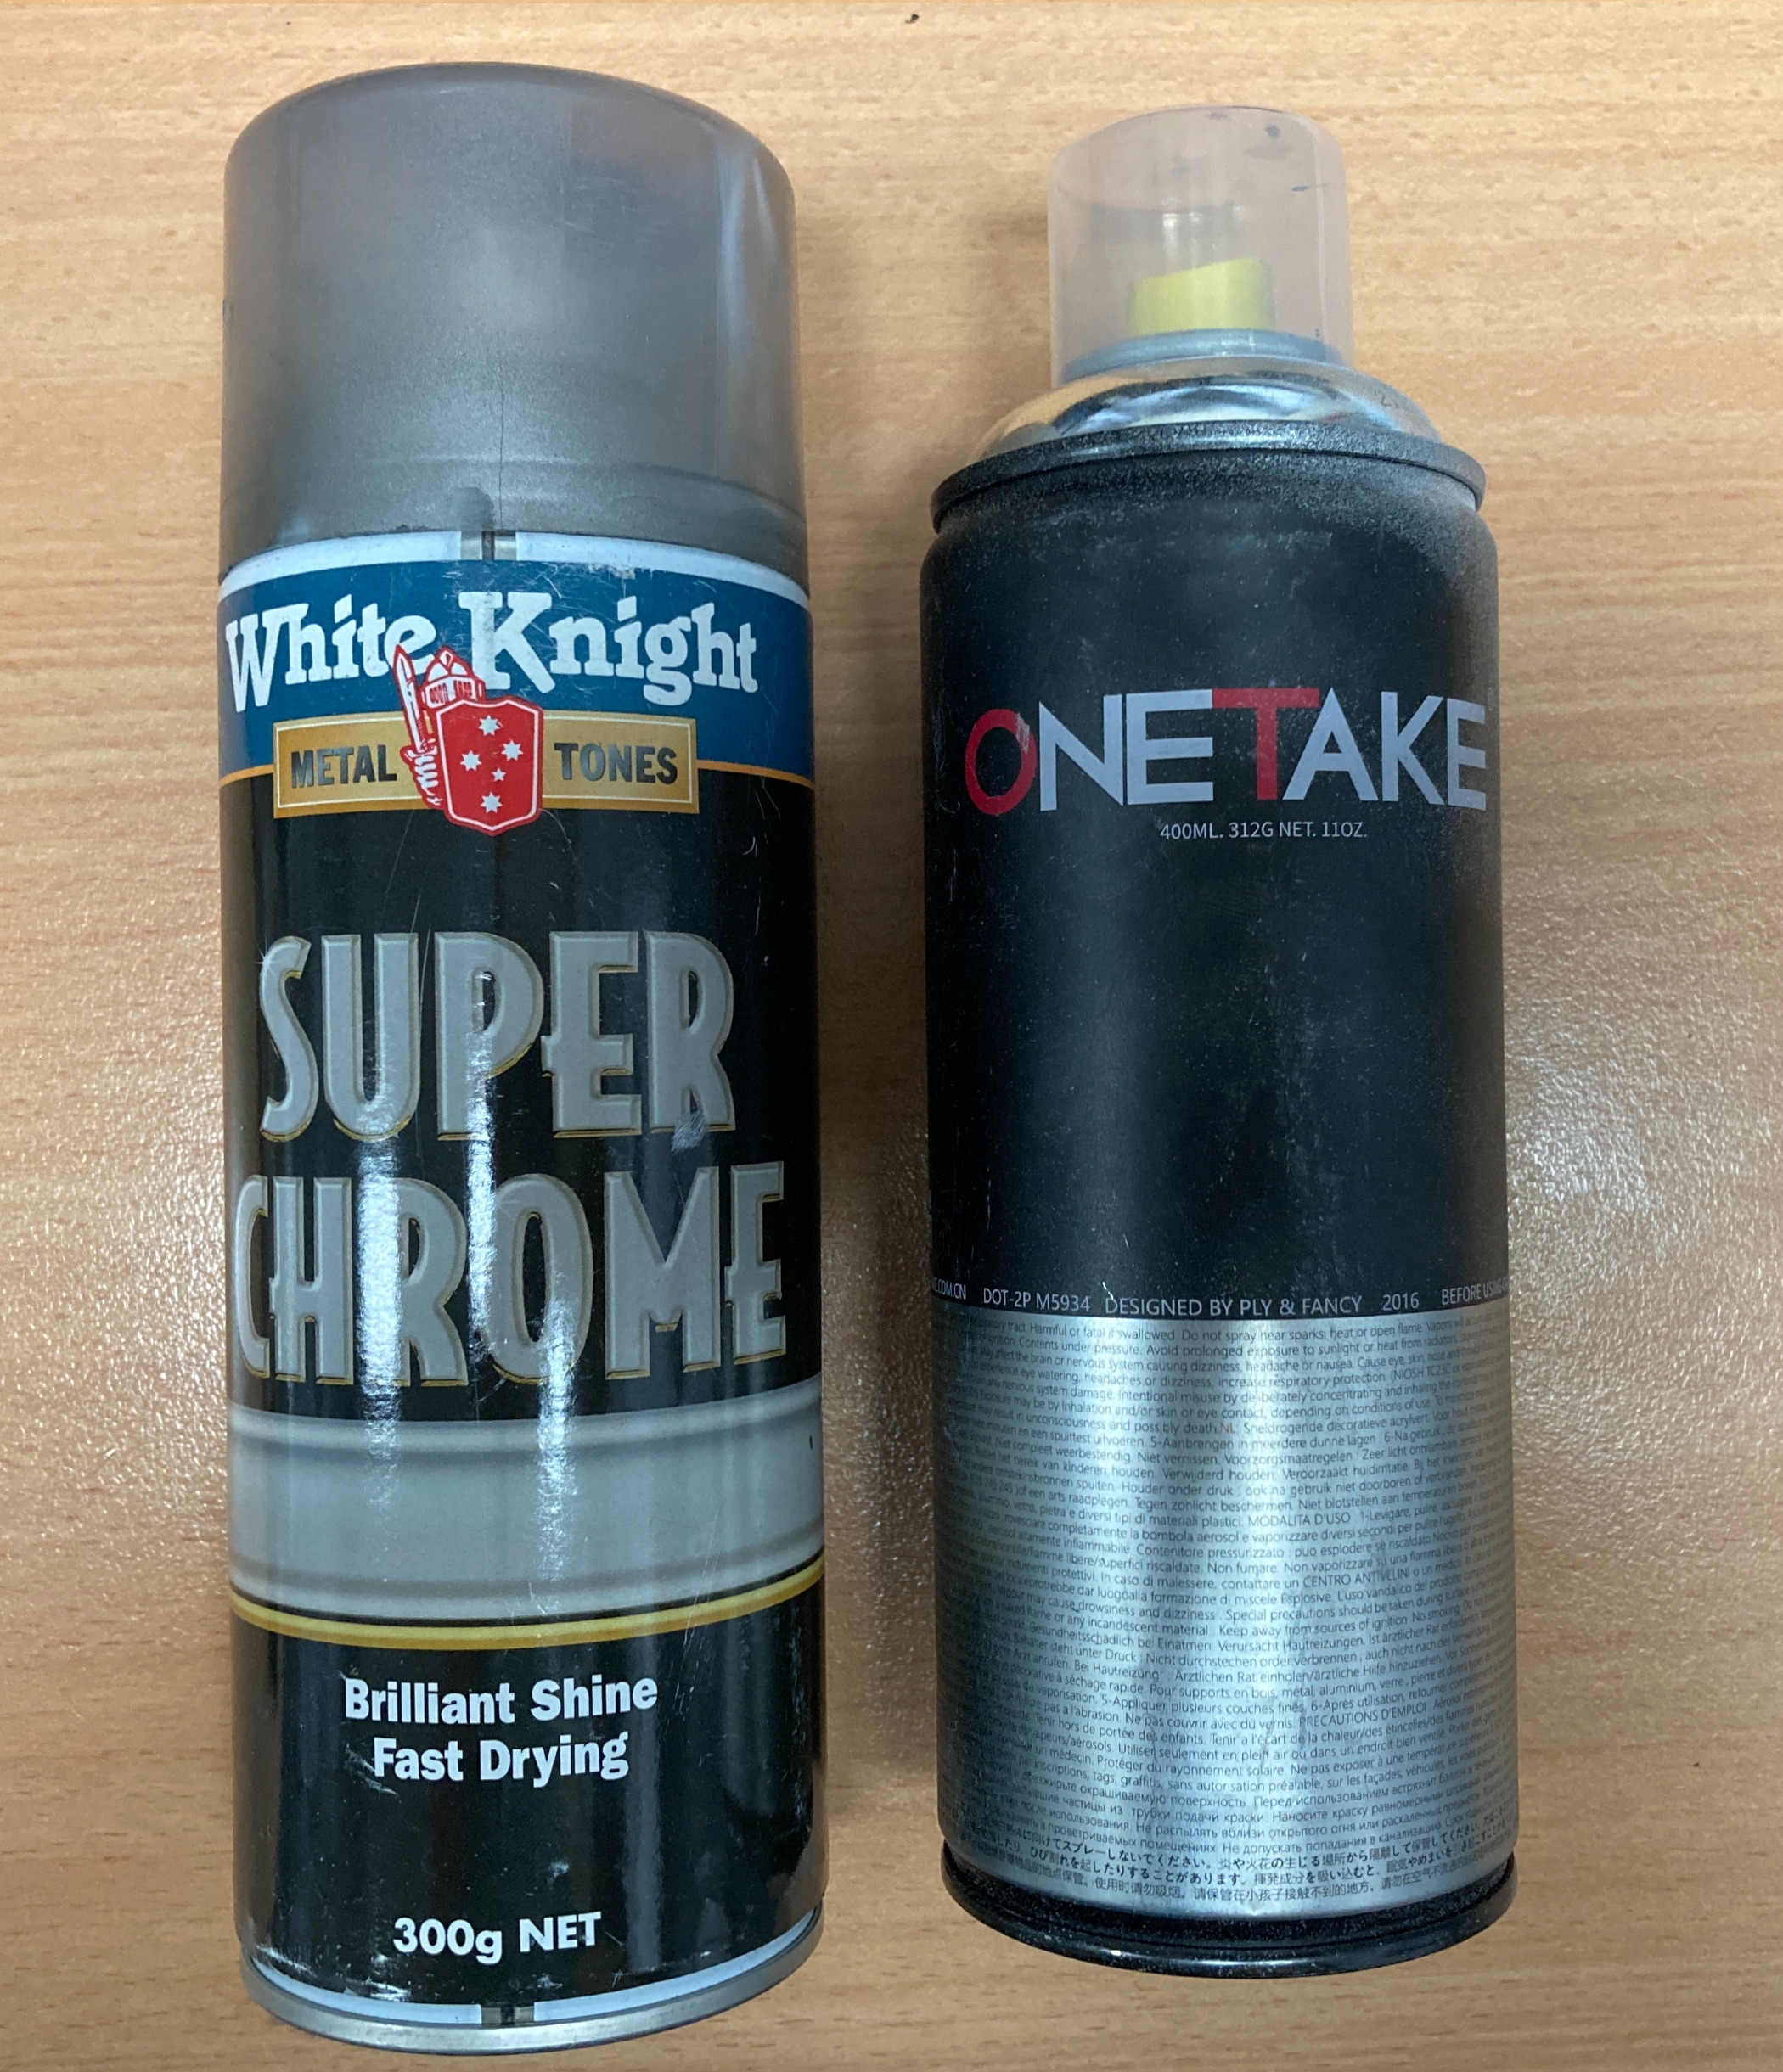
For the Chrome Finish, I used the following paint supplies. You can also see most of these tools and supplies in the image further below. I got a much better chrome finish using the ONETAKE Chrome Finish, a result that was less grey and more vibrant. I have also seen excellent results with chrome paints when using an airbrush.
- Super Chrome Spray Paint
- OneTake Chrome Spray Paint (Better Choice)
Initial Post-Processing
For both these finishes it was crucial to sand down and add layers of primer to the surfaces. This is to smooth out the layer lines so the model looks beautifully smooth when painted. The mask also needed to be assembled in which I used superglue to adhere the two pieces. For the mask I also used wood repair putty to fill some of the larger holes from marks left by the support structure which I would then sand back even. This was a new technique that I had not used on 3D prints before and it worked out beautifully. In the image below you can see under the two eyes of the mask with one with the putty dried after application and the other with the wood putty then sanded back.
An Initial Sandpaper over all surfaces really helps the first layer of primer to stick. When doing that first sand 280 Grit sandpaper is a really good starting point for these PLA components. For both models, I used three layers of primer putty spray-paint. For each layer I gave 2 hours of drying time. Each of the layers I sanded back aggressively except for the last. Below you can see an image of the mask undergoing this process at 2 layers of primer deep.
Iron Finish
The Rub N Buff and the Pearl Ex Powder Sparkledust in combination make for spectacular finishes. The process I go through to do this finish is:
- Apply two coats of matt black as a base coat layer using Black Spray Paint
- With a small paintbrush applying the Pearl Ex Powder. Really definitely make sure you are wearing a mask. This is more about rubbing all over the surface, getting the powder residue into all the nooks and crannies. The tool to use here is a small painting brush as the static electricity picks up the dust. By dusting it all over the surface you get glints of light that emulate that metallic sparkle you get from raw iron ore. Currently, it will be very easy to rub off the surface of the object and this powder has the capability to go everywhere so plan how to minimise mess before you start.
- Next, apply two coats of High Gloss Clear Spray Paint. This will seal the Pearl Ex Powder onto the object.
- Finally, apply the Rub 'N Buff. A little bit goes a long way that Rub N Buff, make sure to use gloves when using it as it does like to stick on fingers. Rub 'N Buff is that special secret to better cosplay and completely new to me before this project. The more you rub it off the better the final result and it makes a huge impact on the final result. Acrylic paints can also be used instead for this stage but I find Rub 'N Buff easier to apply.
Below is the final result of this process. If I was to do it again I would use slightly less Rub 'N Buff and taken more time in the post-processing to hide the point of connection near the wrist. Nevertheless very happy with the result. The Model comes from Scan The World and is a scan of The Mighty Hand at the Musée Rodin in Paris. Auguste Rodin (1840-1912) was fascinated by the human hand and spent a large amount of time producing very emotionally charged sculptures of hands out of marble and metal. Big thanks goes to Mieszko Lacinski for the great scan.
Chrome Finish
Chrome by itself is neither a colour or a shade it is a reflector like a mirror. Chrome is all about light reflecting off it and sheening. The effect I needed for this mask is a metallic chrome which I am very happy to have achieved, it is worth noting there is a whole range of chrome coloured paint to choose from. Creating a sweet chrome finish requires multiple paint layers, never overpainting at layer and on the final layer a really smooth, very even coat. It is all about creating flat and smooth surfaces that will reflect light off like a mirror.
In my experience Chrome spray paint is the toughest paint to get a good convincing finish on. This goes particularly true for 3D printed objects as the printed layers created ripples on the perimeter of the object when you look up close. 3D printing smaller layers minimises this problem but if you are going to get anywhere with Chrome you have to do that post-processing and sand prime all the surfaces perfectly smooth. Good spray paint technique involves wearing gloves and mask, shaking the can for 5 minutes and spraying in an arc from 45 cm away from the component. Pay close attention to sections that haven't been painted. Once the final layer is painted leave the object to dry in a ventilated, dry and dust-free area for at least 3 days before even thinking about touching the painted surface. The paint will stay tacky and very easy to mar during that time, any fingerprint marks will completely ruin the chrome finish.
Furthermore, it is one of those situations were better (more expensive) paint will yield better results. The spray paint I bought from the hardware store ended up being much more grey and dull looking as compared to my local spray paint and general graffiti culture goods store. The paint I purchased from the spray paint store is the one you can see the final effect on and it had a much brighter mirror finish. The hardware store can recommends for a final finish to spray a layer then come back and spray it again lightly an hour later however this gave me a worse finish than doing it all in one go.
All together I used 4 layers of spray-painted onto the mask and multiple days of drying was done for each layer.
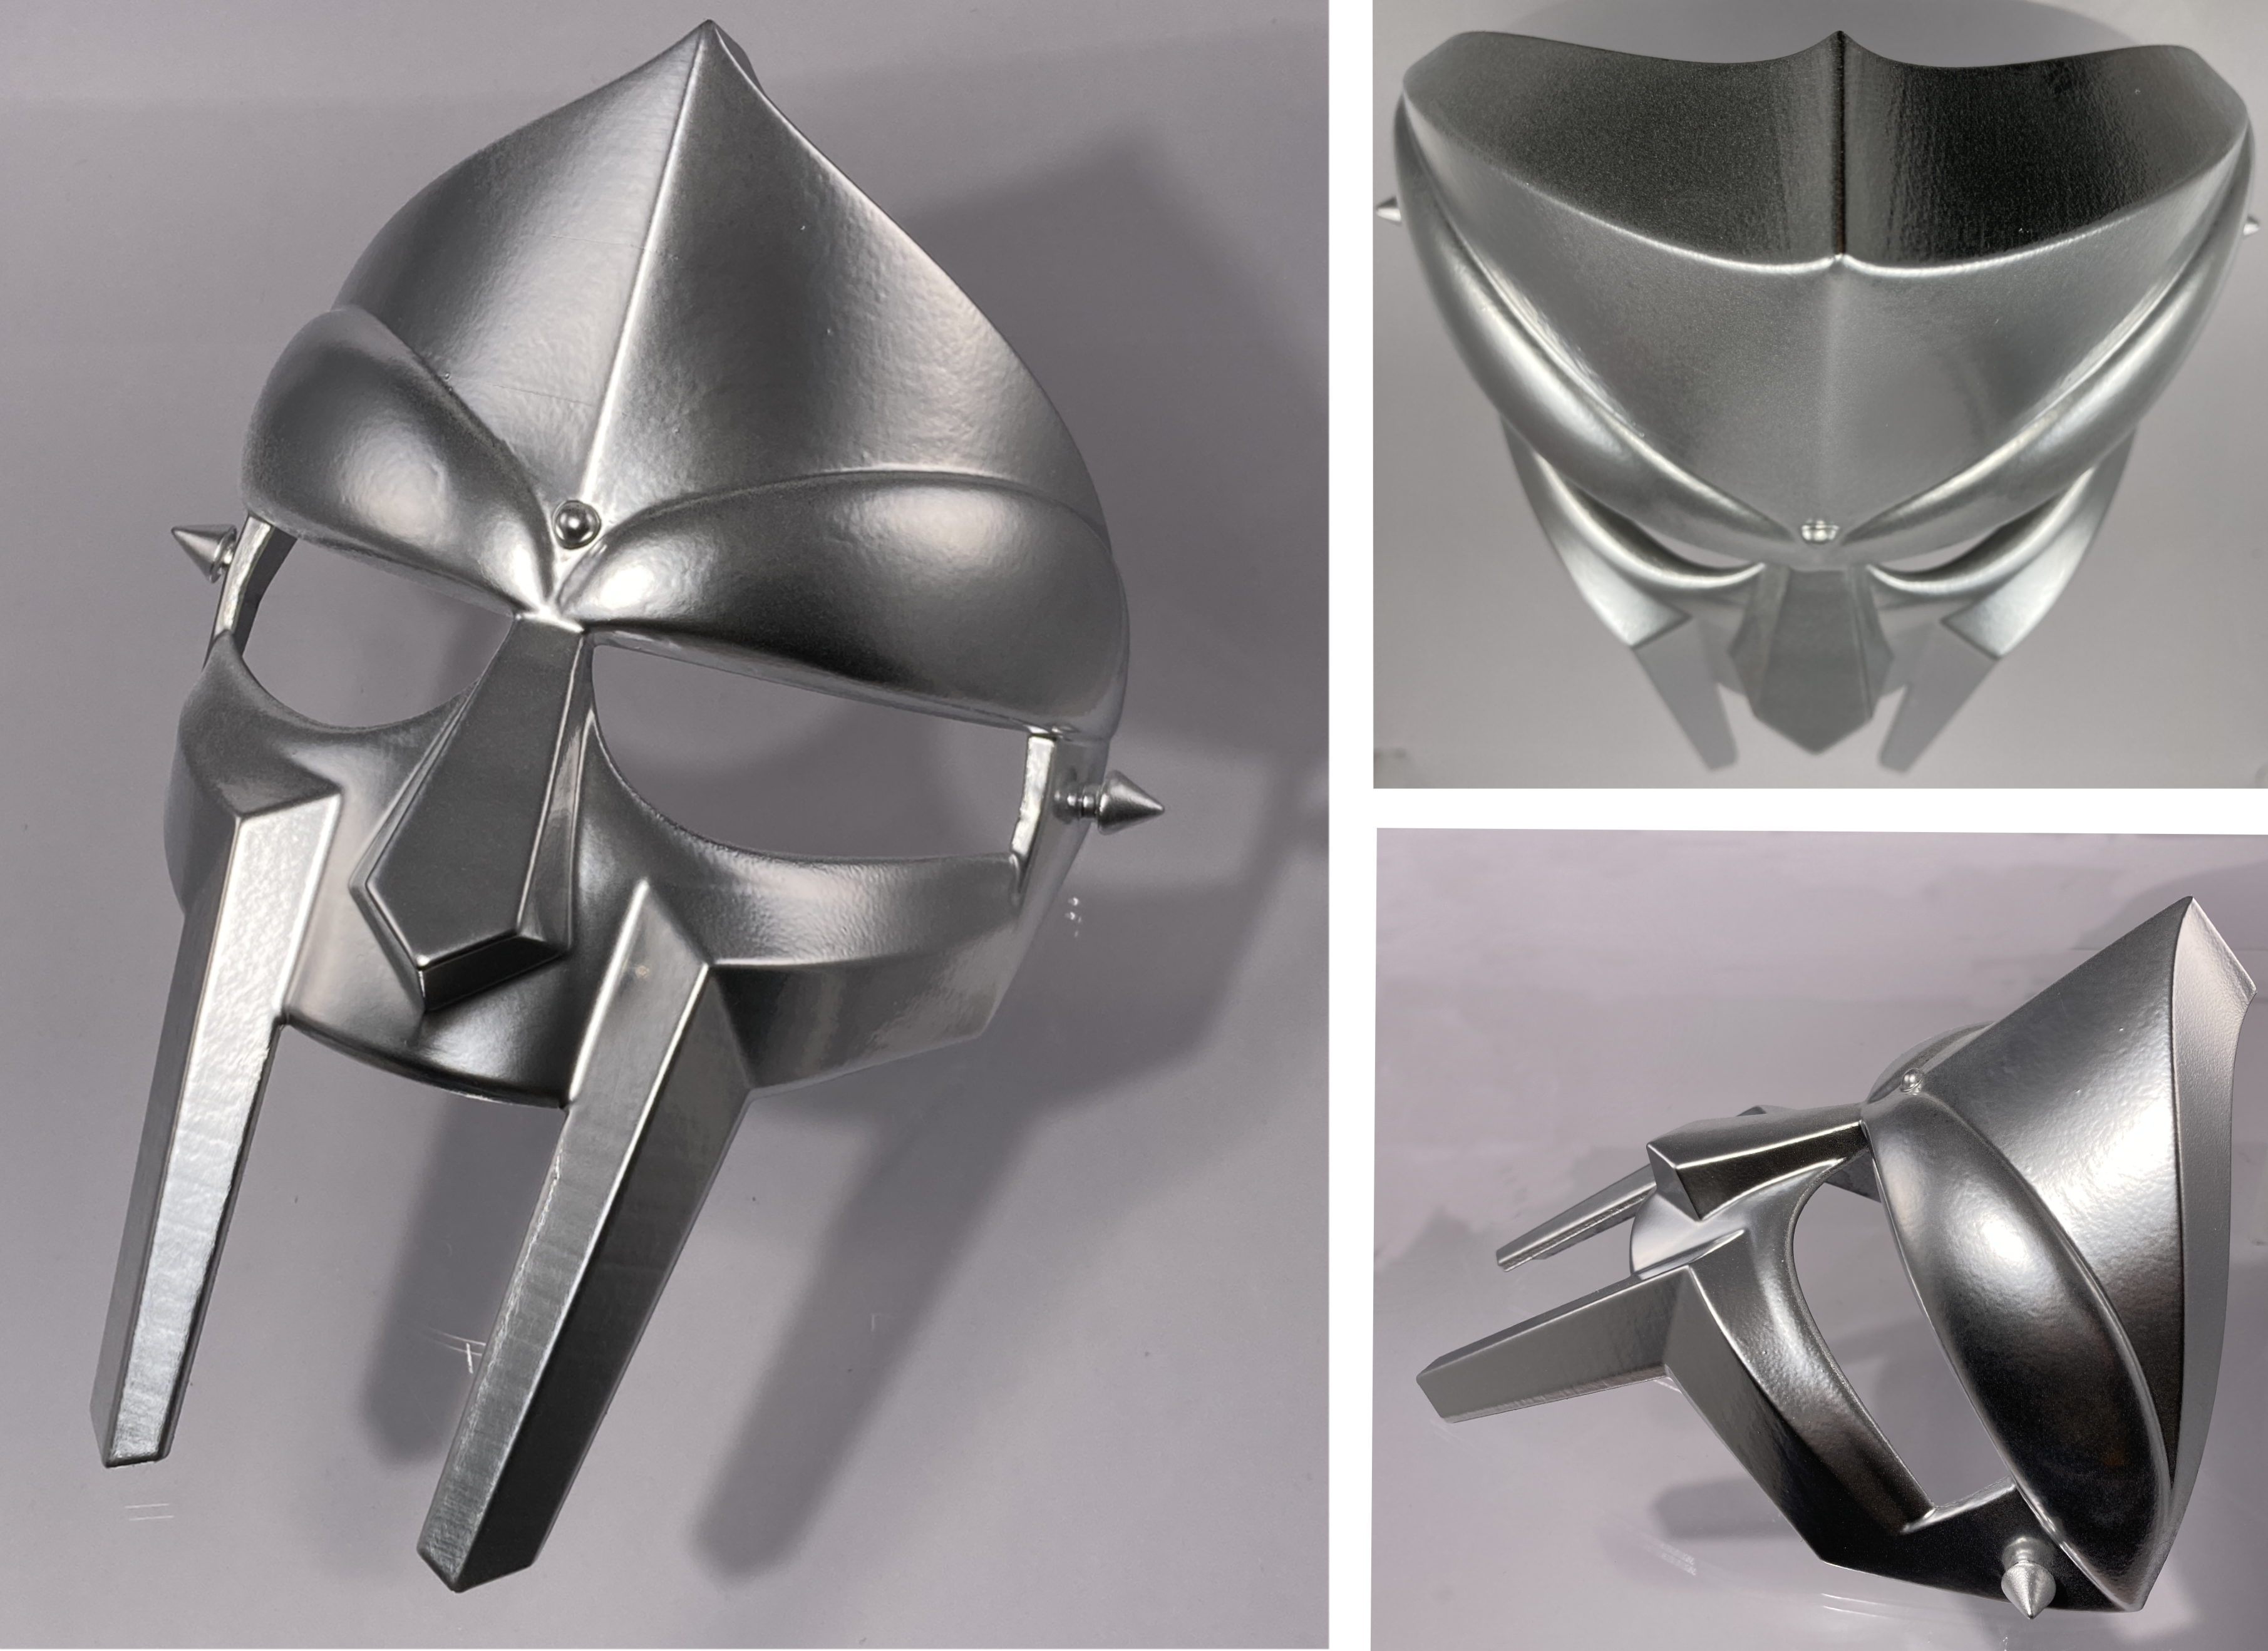
See below for the final results of this process. If I was to do this process again I would very much like to use an airbrush. Also, I would have gone straight to using the better One Take Chrome Spray paint which was recommended to me by an excellent fellow down at Front Runner Arts Supplies. Big thanks goes to Mitchell Harvey for the model.
Download STL Files
Download the STL files for these designs in a Zip format by clicking the attachment below.

