The Raspberry Pi Zero W is a tiny, yet powerful little device. Coupled with a Pimoroni Speaker pHat, it can be easily turned into a portable Airplay speaker which allows you to stream your music anywhere you want.
Parts you'll need:
- Raspberry Pi Zero W (Wireless) and Raspberry Pi GPIO Male Header - 2x20
- OR If you don't want to solder - Raspberry Pi Zero WH (Wireless with Soldered Headers)
- Pimoroni Speaker pHAT
- GPIO Hammer Headers - Solderless Raspberry Pi Connectors
- Adafruit Raspberry Pi Zero Case
- Stackable 0.100″ Female Header: 2x20-pin, Straight
Tools and Other Components
- Micro USB Power Adapter
- Micro SD Card - If you don't have one
- Soldering Iron and Solder (not required if you use the Hammer Headers)
Step 1 - Installing a Pin Header to your Pi
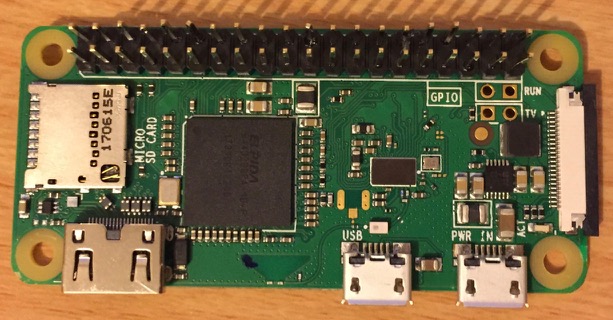
The Raspberry Pi Zero W does not come with GPIO header pins so you'll need to solder some headers onto the board. If you don't want to risk soldering your board, you can either purchase a Pi Zero WH (linked above), which comes with pre-soldered GPIO pins, or you can use the awesome GPIO Hammer Headers (also, above) which makes installing the pins much easier. I should have gone with the Hammer Headers, as my soldering skills were a little rusty. Here is a picture of my Pi Zero after my botched soldering job. (It works, but some of the pins are a little wonky because I kept the soldering iron on them too long.)
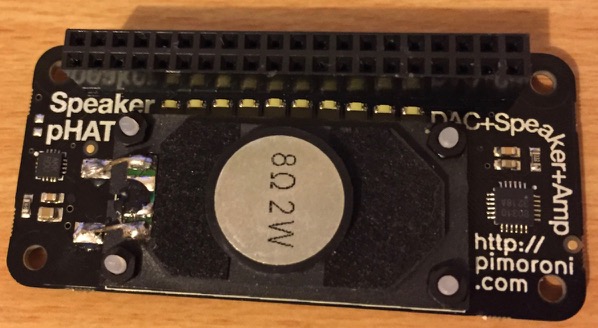
After soldering the GPIO pins onto your Pi Zero, you will need to solder the headers onto the Speaker pHat board. Again, if you are scared of soldering, you can always use the Hammer Headers to make things easier. I managed to do a better job soldering my Speaker pHat header on, but Hammer Headers would definitely have been easier!

The Speaker pHat needs a little more soldering before it is fully functional. You need to solder two small pieces of wire to connect the speaker to the terminals on the board. The Pimoroni Speaker pHat website has some good instructions to help you with these steps.
Step 2 - Setting your Pi up with an OS
Install Raspbian on your Pi Zero. The easiest way to do this is to use NOOBS. The Raspberry Pi Foundation has a good guide on using NOOBS if you need help with this step. Don't forget to update your operating system. Again, the Raspberry Pi Foundation has a good guide to help you update your Pi's OS.
Download and install NOOBs to a microSD card and proceed
Step 3 - Installing the Speaker pHat software
Once your Pi Zero is up and running with the latest operating system, you need to install some software to make the Speaker pHat work.
To use the Speaker pHat as a regular speaker for your Pi, all you need is the Pimoroni Speaker pHat software, which is installed with a simple, one-line script that you can enter into the Linux terminal within Raspbian:
curl -sS https://get.pimoroni.com/speakerphat | bash
Follow the prompts and before too long you will be ready to use the speaker on your Raspberry Pi to play games, or for any other use, you have.
If you want to stream Airplay to your Pi, there is a different installer you need, which Pimoroni describes on their Streaming Airplay to Your Pi page. The Shairport software can be installed with another simple one-line script:
curl -sS https://get.pimoroni.com/airdac | bash
Follow the prompts again and the software will be automatically installed for you. When everything is finished you will have to reboot your Pi and you are then good to go.
Final Step - Housing your project!
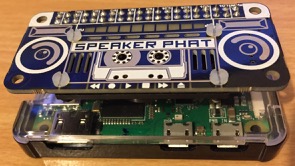
The final step is purely optional. Find a nice case to protect your Pi and Speaker pHat. I found the Adafruit Raspberry Pi Zero Case worked perfectly for this!
Another neat option is to 3D Print a case, with tonnes of designs available. This one from Adafruit is pretty cool.
To make everything fit, however, you will need to use an extender to raise the Speaker pHat above the clear cover of the Adafruit case. I had a spare booster header which I used with my Pi, but this Stackable 0.100″ Female Header should work fine too. Stacking the booster header between the Pi Zero and the Speaker pHat allows the speaker to clear the cover of the Adafruit case and the final product looks kinda cute!
Wrap Up - Booting and final thoughts!
With everything in place, all you need to do is plug a Micro USB power cable in and wait for the Pi to boot up. You will then be able to stream your iTunes, iPhone or Mac audio to your Pi Zero wherever you are. The sound is not audiophile quality and is actually a bit tinny, but I find it is good enough for listening to podcasts or audiobooks while I am working around the house.
One potential problem with this setup is that you can't safely power down the Pi when you are finished listening. Unplugging the USB power can cause some issues, so I am considering adding a Pimoroni OnOff SHIM for Raspberry Pi to safely power down the Pi when I am finished listening. Another enhancement I am considering is some kind of battery power so I can turn this into a truly portable Airplay speaker.
If you have any questions about how to put this all together, don't hesitate to ask! Oh, and if anyone adds those features in, I'd love to hear about it. Thanks!

