Hi. My son and I have made our first Racing Simulator Motion Platform. It has been a challenge but we now have a playable situtation
It has been a long journey, starting off with info from the great people at www.xsimulator.net and a lot of learning and questioning.
Originally we started with Ford Ranger wiper motors as the movers, controlled by an Arduino Uno and a Moto Monster motor controller. This was due to cost. We learnt a lot, and it worked fine, but we needed more grunt.
We bit the bullet and purchased two 200w 12v DC motors from Motion Dynamics (vs the 40w wiper motors) and two 12v12 JRK's from the good people at Core Electronics. This changed the cost 10 fold, but well worth it, and so much easier to set up.
Now my son is grinning from ear to ear.
This video is of the magical moment we figured out a few more tweaking items on the software side which brought the whole thing to life even more.
Here is a list of the components, assuming you have the PC, monitors, pedals, steering wheel and sounds.
- Chassis: 25mm x 25mm x 3mm SHS tube (approx 6 metres)
- Uni joint connected to a slip joint (to be able to separate the top deck from the lower deck)
- 10mm alloy rod (approx 2 metres)
- 2 x 200w 12v DC motor with worm drive gearbox
- Galvanised right angle plate from Bunning's concreting section (the final bracket has welded gussets to stop flex)
- 230v AC to 12v DC 100w converter
- 2 x 12v12 JRK's (with the JRK setup software)
- A case to house the JRK's with the cooling fan (I used a PC power supply case)
- 4 x 10mm Rose joints to attach the rod to the motors and the upper deck
- 2 x 10k B Potentiometers
- Manufacture 2 x spindles with a plate at one end to attach to the rod and a hole at the other to fit the potentiometer spindle (this slides through the gearbox centre)
- A few Deutsch Plugs or other type connectors (I used the 6 pin Deutsch Plugs for the motor power and earth cables along with the 3 pot wires)
- Conduit to tidy up the wiring
- An expired seat from a V8 Supercar (if you have the contacts ;)...) or anything you can find at the right price


Putting it all together:
Once the top deck and bottom deck were created the critical part was to make the top deck sit as neutral as possible on the pivot point i.e. with all the game hardware and the person sitting in situ, it had to balance. This means that the motors are only reacting to the game outputs and not having to struggle with the weight of the driver
The Software:
There is a vast array of software out there, however, we use SimTools to get the racing sim game being played to communicate with the JRK software.
Xsimulator.net is a DIY motion sim info site where they explain that one system doesn't fit all, in the DIY world. The forums are full of information, with some very smart people when it comes to using their software and the physics involved. You can learn about installing SimTools here.
The next piece of software takes control of the JRK's. This and all the info relating to the JRK's is really well documented on the Pololu site.
This next link eventually gets to a fantastic setup as a starting point for the JRK's in this situation. This forum post helped a bunch!
In short, the SimTools program takes the telemetry information from the game and sends it to the JRK software, which controls the motor inputs.
There is a lot of tweaking and fine tuning once it is all connected, but is a lot of fun once you understand what is going on. It took us a year or so to get to the stage we are at now. Being patient and learning by trial and error got my son and me to the other side. Sometimes the patience wore thin, but we got there.
I took the time to show it a bit better with a couple of Paint 3D images.

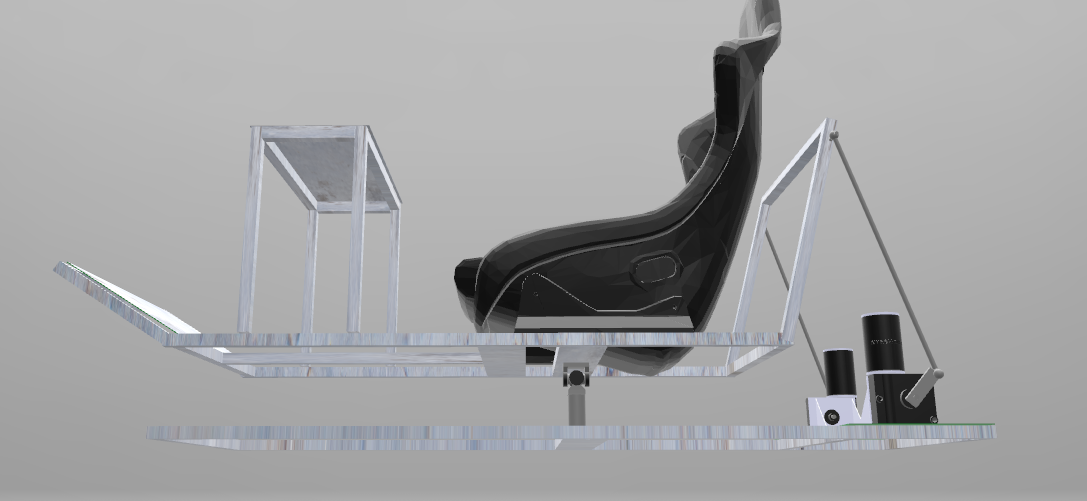
I'd love to see if anyone else has done something similar!

