Hello and welcome to another tutorial on the joys of RetroPie. Today we’re going to look at making RetroPie even better. If you’ve had the chance to play around with the RetroPie system, you’ll have noticed that whilst it comes with a huge number of emulators, not all emulators run equally. For example, the original NES games run a smoothly as a waterslide with soap, whereas the Nintendo 64 emulator has particular trouble maintaining a high frame rate. This is to do with the way that the original consoles were designed to run the games and the way that the emulator code reproduces that experience.
If you’re still new to RetroPie and wondering what we’re talking about, be sure to check out our RetroPie Gaming Kit tutorial for a bit of a run down.
So how do we improve the experience? Well, there’s a couple of different ways, but mostly we’re going to be looking at overclocking, cooling, and tweaking the emulator options. If you haven’t already, go and check out our tutorials on Cooling, Stress Testing, and Overclocking your Raspberry Pi.
We’ll assume now that your Pi is adequately cooled, stable, and you’ve played around with the overclocking options talked about in the overclocking tutorial.
We won’t go through every emulator in detail today, (indeed, most of them don’t really benefit from any extra optimisation), however, we’ll be focusing of the Nintendo 64 emulation as it’s one of the most resource-intensive systems.
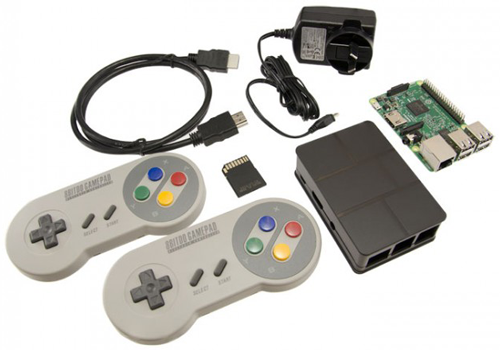
For this tutorial, we used this Raspberry Pi case with the built in fan connected to the 5V pin on the GPIO, and this large heatsink. Together, they do a good job, however, this tutorial is applicable to any RetroPie setup including our pre-bundled kits:
We’ll break this article up into two parts, emulator optimisation, and overclock settings.
Overclocking for RetroPie
This is where things get a little curly. Simply put, there is no one size fits all approach to overclocking. Different emulators will respond differently, however, we can use some general performance increase settings which should do the job for most emulators, however, we found that it really shone with the N64 emulator.
Following our overclocking tutorial here are some good options that you can start with, then try increasing the GPU and CPU speeds, while ensuring that the system is stable:
arm_freq=1350
over_voltage=6
sdram_freq=500
gpu_freq=500
Emulator Optimisation
The other way that we can optimise the RetroPie experience is by tweaking the settings of the emulator itself. Whilst you might want to run a Nintendo 64 game, RetroPie comes with more than one emulator for running N64 games. Whilst the default emulator is ok, it’s not as good as some of the others, and both GLIDE and RICE emulators will give you a much smoother experience. To change the emulator settings for both the entire emulator and also specific games, follow these steps:
- Launch a game of the emulator (or specific game) that you wish to change the emulator settings for.
- Before the game initializes, when the grey box appears, press a button on your controller (or another input device) to bring up the settings menu.
- From here you want to select the default emulator for n64 option and choose either GLIDE or RICE. Bear in mind that both have a high-res option which can increase some in-game resolution, however for a proper HD option, you'll want to download an HD texture pack for the game (but that's a conversation for another day).
- For Nintendo 64, make sure that the framebuffer resolution is 320x240 and the video mode is 1920 x 1080.

As mentioned before, another emulator may give better performance on slightly different settings, however, with the N64 emulators being the most demanding and usually the most commented on, it makes sense to tackle them first.
There are of course countless different tweaks and config settings which will improve different elements of specific games, however as they are usually specific to each game, you’ll need to approach that on a ROM by ROM basis.
So that’s all for now on optimising your Raspberry Pi. As we continue to dig into the wonders that this OS has to offer, we’ll update this tutorial to reflect the best settings we find, however, hopefully, this gives you some insight on what to change and look for to optimise your very own RetroPie setup.

