This one is for the Stargate fans out there. A realistic, 3D printed, light-up Zero Point Module!
I found a model on Thingiverse for a ZPM - It had good detail but - I took issue with the visible seam, and to change the colors of any crystals they had to be painted since it was a single model. I wanted to remix it so it could be printed as a standalone piece both with or without electronics. Throwing this together with some LED strip and an Adafruit Trinket you can now have a ZPM that will light up according to your own script entirely customizable with no need to paint.
Check out the original model on Thingiverse.
Bill of Materials
- PLA filament (not supplied by Core Electronics, however, you may be able to get away with some other exotic filaments if suitable for your machine. PLA should do the trick though)
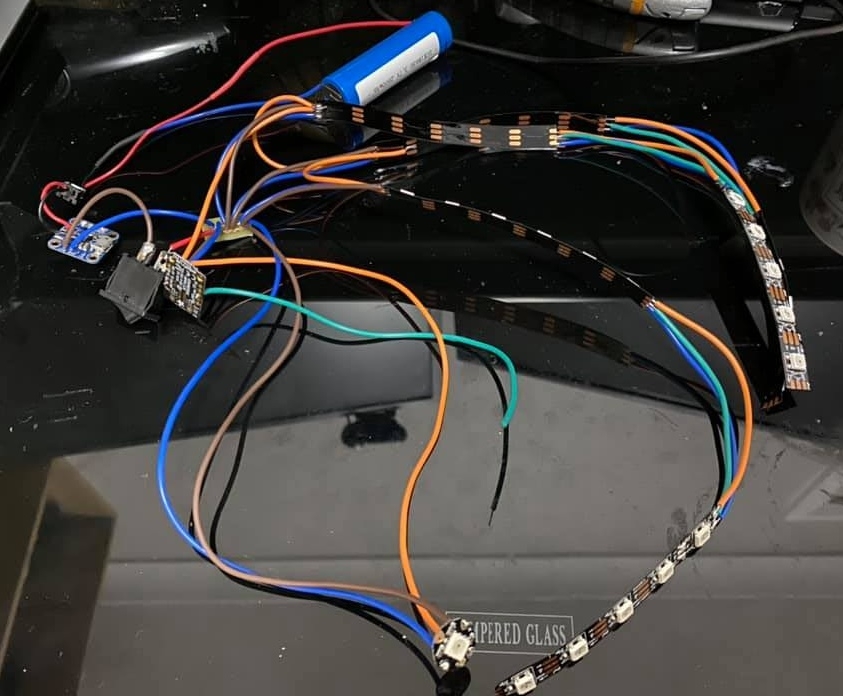
- Trinket MO microcontroller
- 18650 LiPo
- Flora RGB Smart NeoPixel v2
- Adafruit Micro Lipo w/MicroUSB Jack - USB LiIon/LiPoly charger - v1
- 6 lengths of 6-Neopixel strips (WS2812B's)
- Mini Rocker Switch
- 5mm cube earth magnets (Core has some slightly larger at 0.25" (6.35mm) if you can make the clearance for it in your prints)
Getting Started
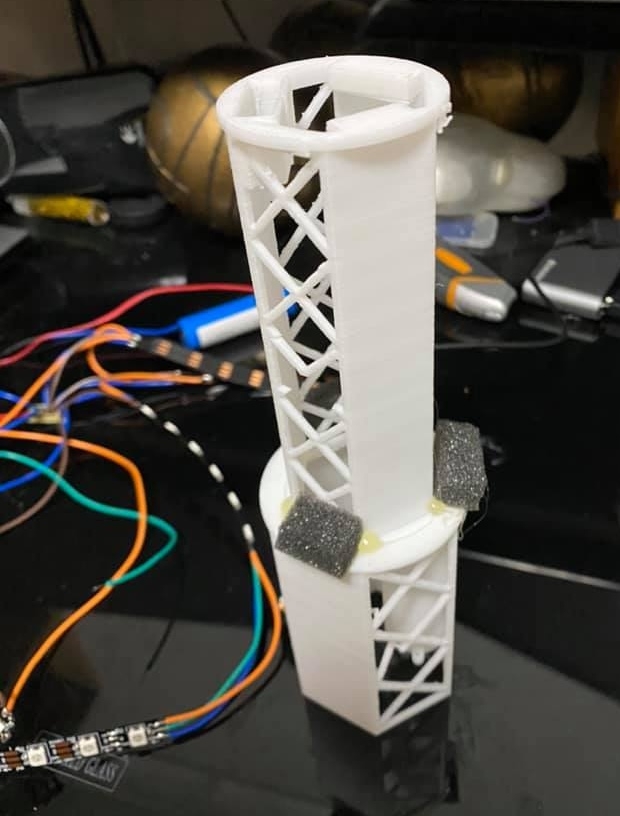
I modeled the piece up in Fusion 360 and started by creating a single crystal for each segment on the top part. I added extras for bulk and modeled individual crystals so they could be printed in green or red where most of the build was printed in translucent orange. The center crystal on top was printed in red translucent PLA. The main model was modeled with 3 main sections - Top, Middle, and Bottom with a bottom core. The top is glued on but the rest snaps together with 5mm square magnets.
 |  |  |  |
|---|
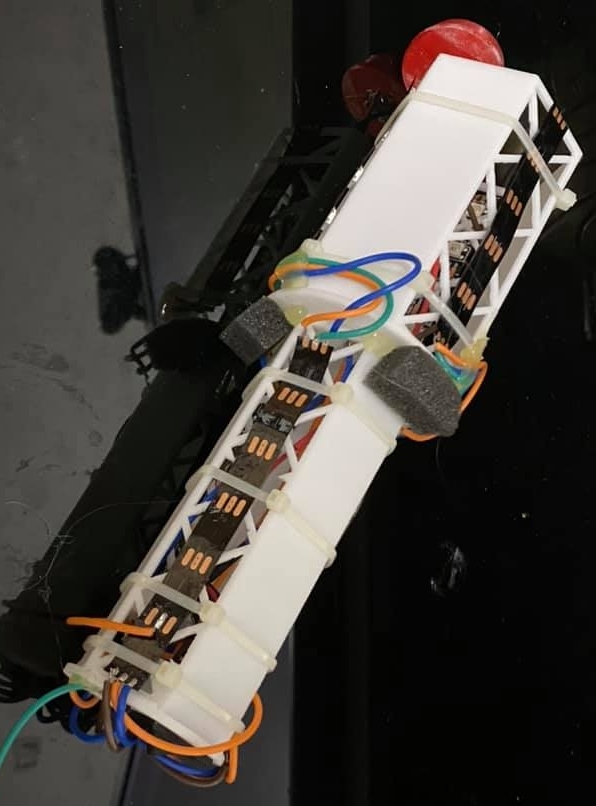
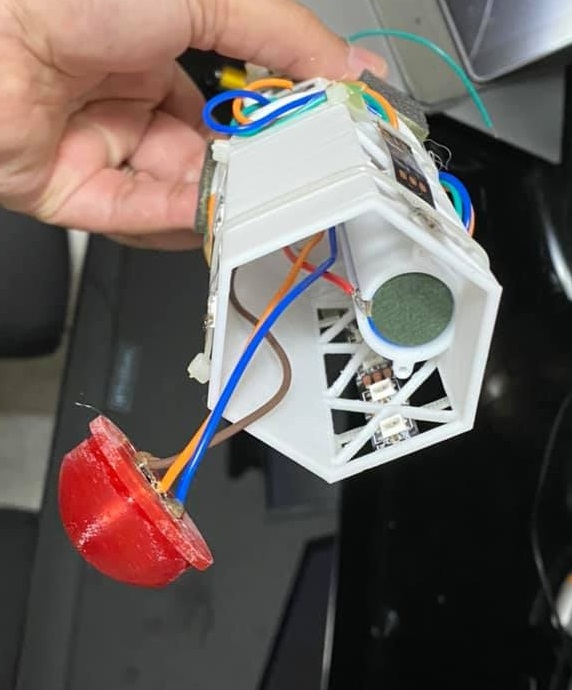
I also created the housing for a LiPo Battery, switch, charger, microcontroller, and Neopixels which were all cable tied to the center housing. I glued the top crystal to the single-pixel first, then attached the electronics mount to the top. Finally, all the pieces slip together. It’s all quite a snug fit so I chose not to glue everything together in case I wanted to service it all later.
 |  |  |  |  |
|---|
The Code - loaded to Trinket MO using CircuitPython:
I used one of the pins on the microcontroller as a capacitive touch switch and when touching it, it cycles through different light effects. I still included the physical switch so there’s zero power draw when turned off by opening up the circuit if necessary.
- First Setting (Default): Off
- Second: Core lit on a slow pulse
- Third: Faster pulse and the center red crystal lights up
- Fourth: switches the lighting off again
### Trinket MO - Stargate Zero Point Module Lighting ###

import time
import board
import touchio
import neopixel

pixpin = board.D4
pixpin2 = board.D3
touch_pad = board.A0  # Will not work for Circuit Playground Express!

numpix = 12
wait = .5  # 1/2 second color fade duration
wait2 = 0.1

y = int
y = 0
y < 4
# defaults to RGB|GRB Neopixels
strip = neopixel.NeoPixel(pixpin, numpix, brightness=1, auto_write=False)
singlepixel = neopixel.NeoPixel(pixpin2, 1, brightness=1, auto_write=False)

def lerp(x, x0, x1, y0, y1):
    # Clamp x within x0 and x1 bounds.
    if x > x1:
        x = x1

    if x < x0:
        x = x0

    # Calculate linear interpolation of y value.
    return y0   (y1 - y0) * ((x - x0) / (x1 - x0))


# Set all pixels to the specified color.

def fill_pixels(r, g, b):
    for i in range(0, numpix):
        strip[i] = (r, g, b)
        strip.write()


# Get the color of a pixel within a smooth gradient of two colors.
# Starting R,G,B color
# Ending R,G,B color
# Position along gradient, should be a value 0 to 1.0

def color_gradient(start_r, start_g, start_b, end_r, end_g, end_b, pos):
    # Interpolate R,G,B values and return them as a color.
    red = lerp(pos, 0.0, 1.0, start_r, end_r)
    green = lerp(pos, 0.0, 1.0, start_g, end_g)
    blue = lerp(pos, 0.0, 1.0, start_b, end_b)

    return (red, green, blue)


# Starting R,G,B color
# Ending R,G,B color
# Total duration of animation, in milliseconds

def animate_gradient_fill(start_r, start_g, start_b, end_r, end_g, end_b,
                          duration_ms):
    start = time.monotonic()

    # Display start color.
    fill_pixels(start_r, start_g, start_b)

    # Main animation loop.
    delta = time.monotonic() - start

    while delta < duration_ms:
        # Calculate how far along we are in the duration as a position 0...1.0
        pos = delta / duration_ms

        # Get the gradient color and fill all the pixels with it.
        color = color_gradient(start_r, start_g, start_b,
                               end_r, end_g, end_b, pos)
        fill_pixels(int(color[0]), int(color[1]), int(color[2]))
        # Update delta and repeat.
        delta = time.monotonic() - start

    # Display end color.
    fill_pixels(end_r, end_g, end_b)


touch = touchio.TouchIn(touch_pad)
RED = (255,0,0)
OFF = (0,0,0)

while True:

    if touch.value:

        y = y   1
    elif y > 3 :
        y = 1

    if y == 1:
        singlepixel.fill(OFF)
        singlepixel.write()
        animate_gradient_fill(100, 98, 2, 200, 195, 0, wait)
        animate_gradient_fill(200, 195, 0, 100, 98, 2, wait)

    elif y == 2:
        singlepixel.fill(RED)
        singlepixel.write()
        animate_gradient_fill(200, 195, 0, 255, 249, 5, wait2)
        animate_gradient_fill(255, 249, 5, 200, 195, 0, wait2)

    elif y == 3:
        singlepixel.fill(OFF)
        singlepixel.write()
        strip.fill(OFF)
        strip.write()
The Final result
I’ve saved all the STLs to 3D print your own version of this model to Thingiverse:
https://www.thingiverse.com/thing:4311911
Let us know on the forum if you've got any questions about putting one together!
Thanks for reading through my project!


