A simple, and affordable build that produces sharp, and consistent heat-bends. A nichrome wire heats a channel. Place the acrylic over the channel, wait for it to reach temperature, and pull the hingeing section to create a bend.
This machine will get hot enough to burn you. Be careful, and don't leave it running unattended.
Materials
I bought all the materials from a local hardware store, except the nichrome wire - it's from Core Electronics.
- Plywood ~900x600x12mm sheet - the hardware store even made the cuts
- Aluminium moulding/channel 12x12mm. This must match the thickness of the plywood.
- Extension spring
- 2x butt hinges
- Nichrome wire
- Wood-screws
Total cost of materials: $55 AUD. Significantly less if you have an odd sheet of ply or other hardware already on-hand.
Tools
- Handsaw / Power saw
- Drill bits
- Sandpaper / File - for rough edges and for any screws that break through
- Clamps - for securing work during cutting
- Power supply - for powering the bender. I used my Rigol DP832, but a cheaper fixed voltage supply will work - you may need to experiment with wire-length. More on that later.
Plans
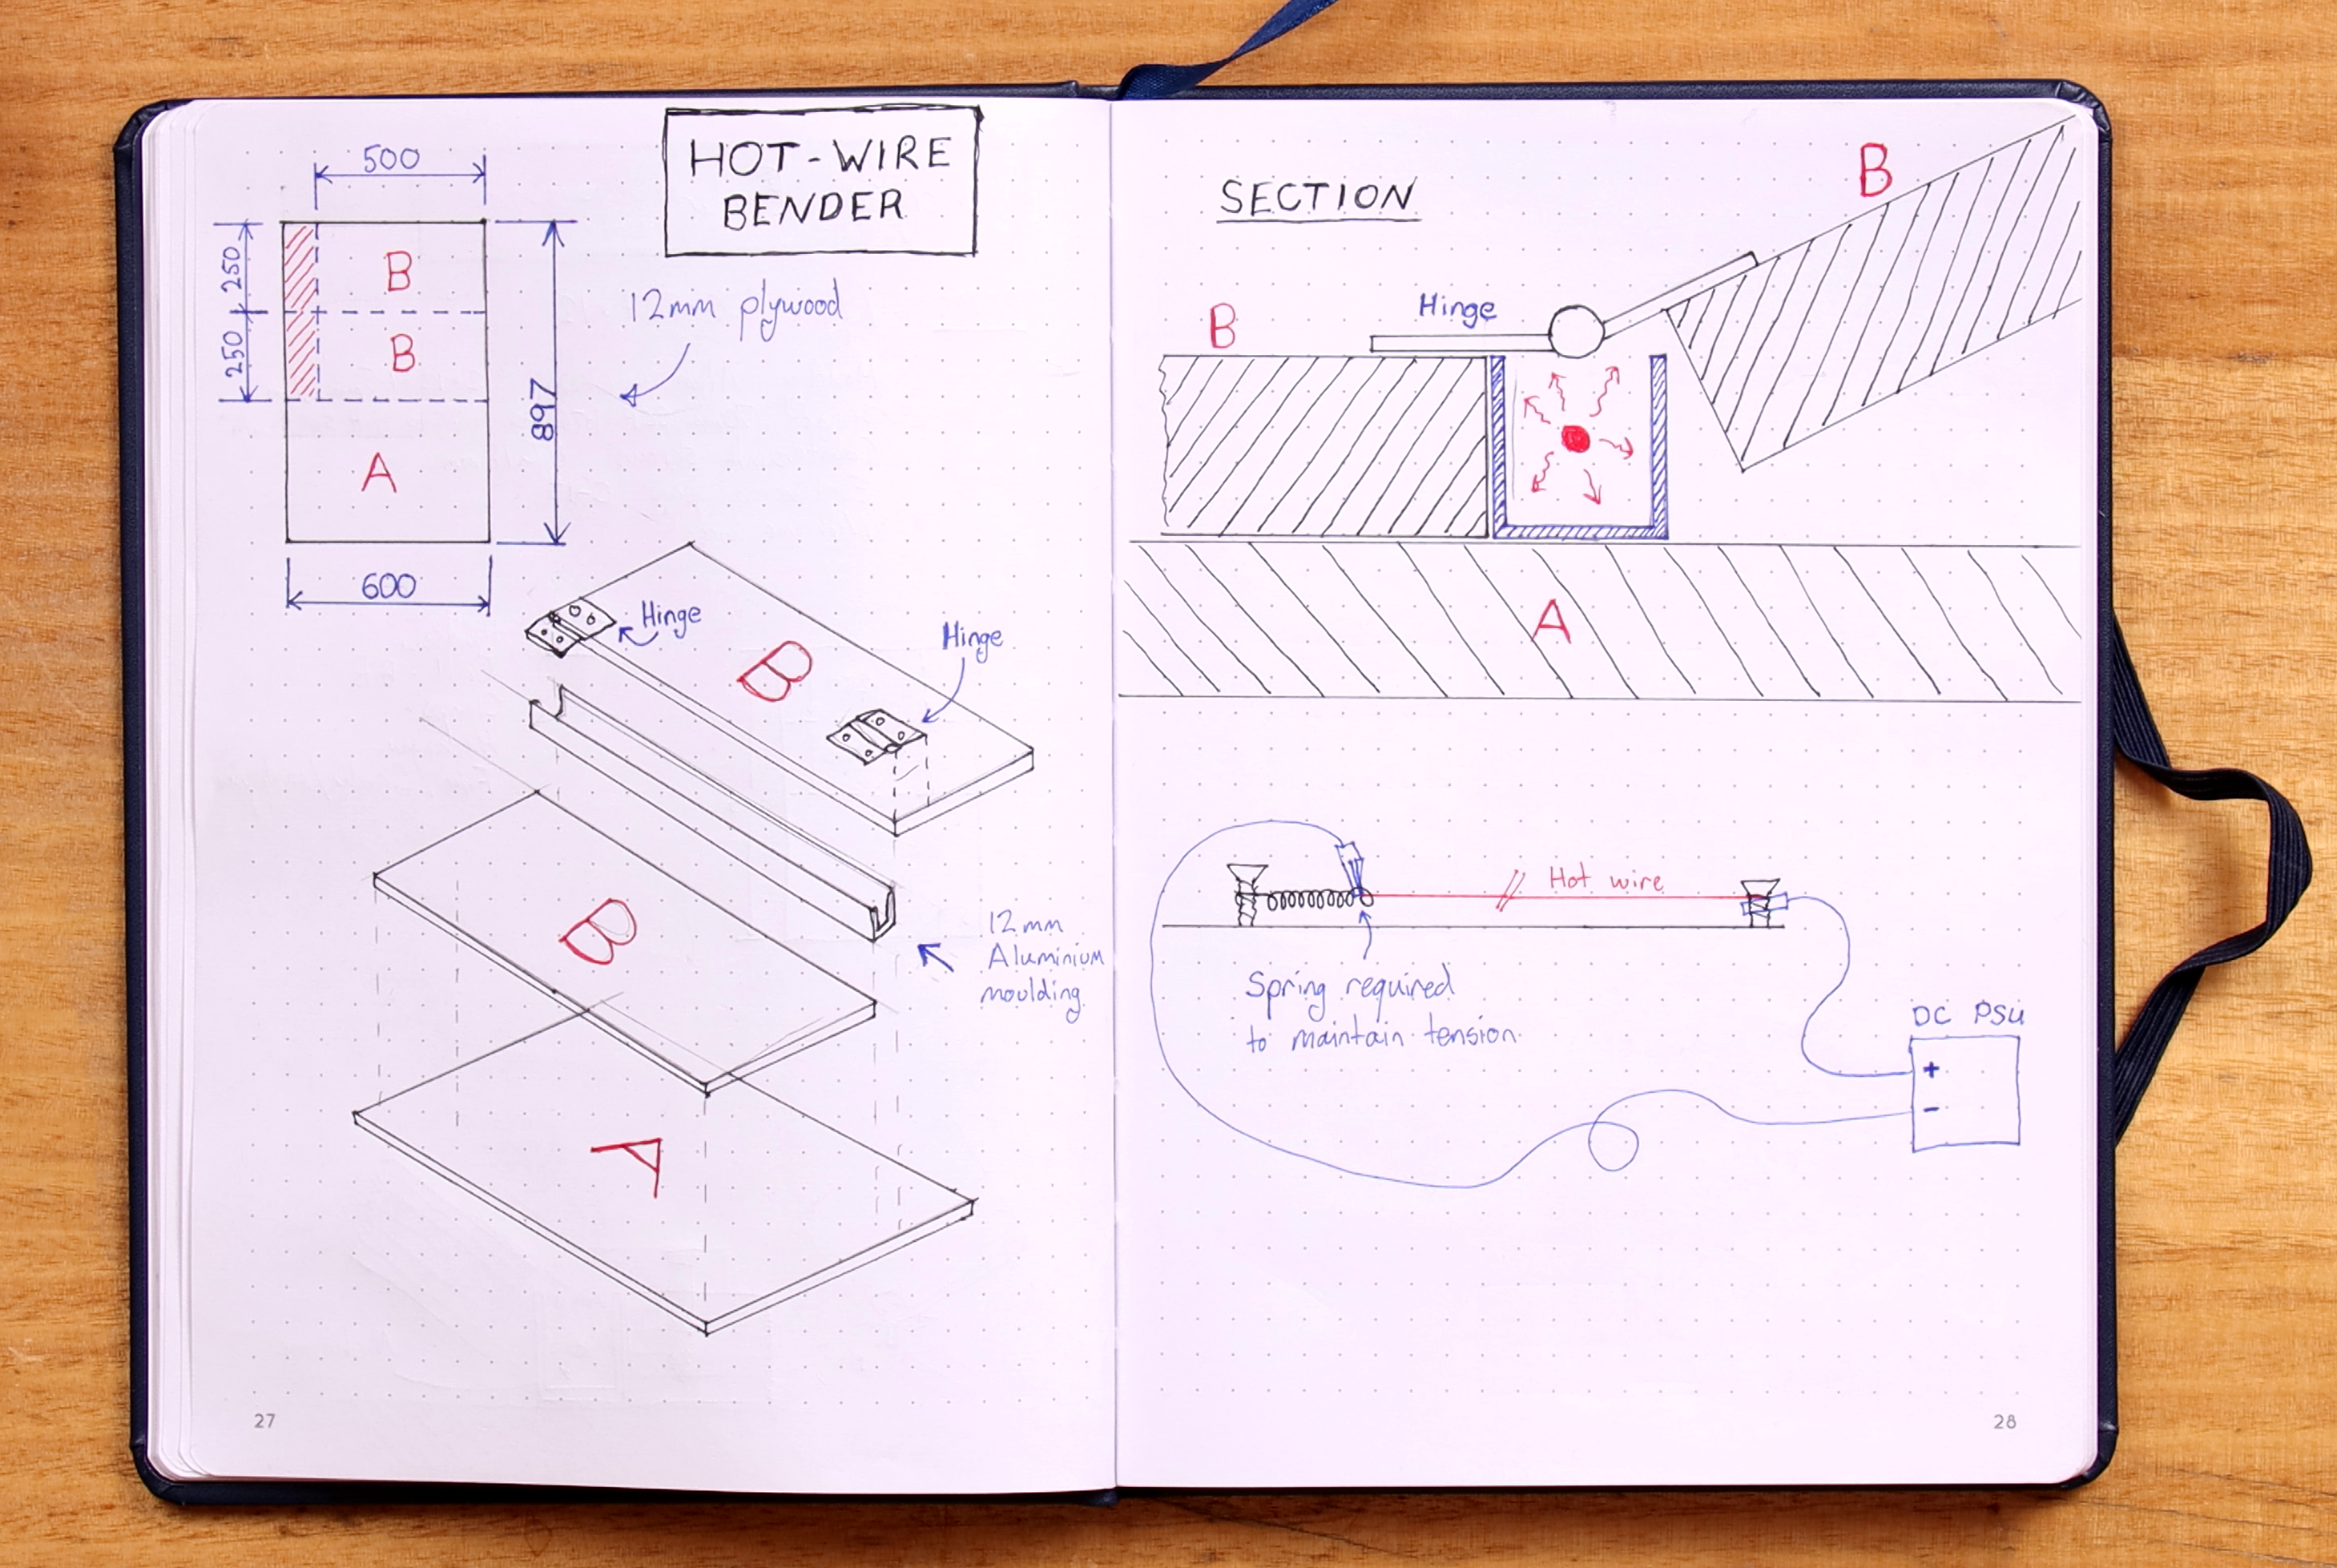
Plans for the bender. Click for a full-resolution version.
Assembly
The attached video will provide insight into the finer details.
- Cut the plywood as indicated. Line the long edge of a B-panel flush with the long edge of the A-panel. Position the B-panel so a short edge is about 8cm from the short edge of the A-panel and secure it to the A-panel with countersunk screws.
- Cut the aluminium moulding to match the long-edge of the B-panel and screw it to the A-panel.
- Lay the long edge of the remaining B-panel along the aluminium moulding and join the the fixed B-panel with two hinges.
- Insert a screw at each end of the moulding to anchor the wire. Leave enough room on one end for a tension spring.
- Anchor a length of nichrome wire to the fixed screw by twisting/tying. Thread the other end through the end of the tension spring and tie taut, extending the spring by ~3 cm.
- Connect the power supply to the fixed-screw, and to the wire-end of the spring or it may anneal and reset its... 'springiness'...
Using the bender
Power on your bender, place your material over the heater. Wait for the material to heat sufficiently and then lift the hinged-panel to bend it. The only things to be careful of are to keep the wire centred in the aluminium moulding - if it touches in one place that's not a big deal, but if it touches in two places you risk burning out your heating element.
Using a different power supply
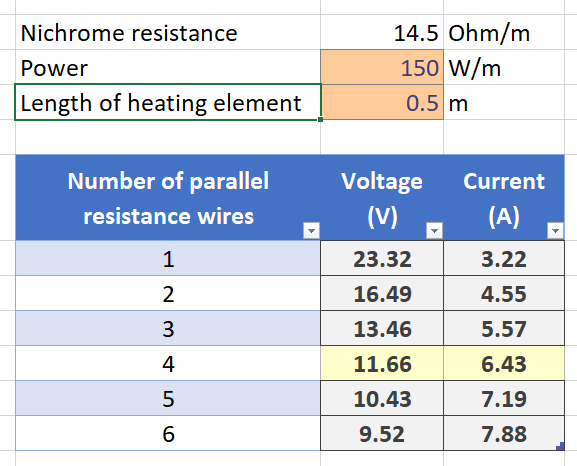
For my ~52cm length of nichrome wire, I had my power supply delivering 3 Amps at about 23 Volts. 3 Amps is sufficient to bend 3mm acrylic, and I think there's still room to drive the wire hotter. If you don't have a variable supply like the one I used, you can still complete this project! A fixed 12V supply will work if you twist the nichrome wire into four parallel strands. This power supply will need to be capable of delivering a higher current to deliver the same heat output as my build. The process for combining nichrome into parallel strands seems to involve twisting the wire and heat-cycling it. After a heat-cycle, the wire will anneal to the new shape and tend to remain twisted. If you attempt this process I'd love to hear your experience!
The table below summarises power supply requirements for a heat-bender with a given size and number of parallel strands. If you're using a 12V power supply, refer to the 11.66V / 4-twisted-strand row.
The spreadhseet is also attached at the end of this article so you can experiment with design parameters.
Improvements
I'd like to screw a guide to the work surface for reliably square bends. This would be as easy as squaring up a strip of scrapwood and screwing it down. Removable wedges cut at desired angles could be placed at the hinges to give repeatable, consistent bend-angles too.
Consider building this bender with formply - the smooth surfaces may be eaiser to keep clean, protecting your acrylic against scratches.
As-is, I connect to the hot-wire using alligator clips. Now that I have a working bender, I could bend an acrylic shroud to mount some banana terminals, and mount that assembly to the bender. Wiring the terminals to the hot-wire will make for much more reliable connections that are less likely to pull the hot-wire into contact with the aluminium channel.
Conclusion
This bender produces great results for the cost and effort that went into building it. It's also easy to scale-up if you need to bend larger sheets: Use the attached calculator to find appropriate power parameters for your version.
If you build your own hot-wire bender I'd love to see the results, and any improvements or customisations you add. Happy making!


