I wanted to build a weather station. After some googling I found a great ‘how to’ guide using a raspberry pi.
I was also interested in learning Python, so I decided to dive right in and start working at building my own weather station.
Hardware used:
- Raspberry Pi 4 Model B 1GB
- Raspberry Pi 4 Power Supply (OFFICIAL) - USB-C 5.1V 15.3W (White)
- Adafruit BME280 I2C or SPI Temperature Humidity Pressure Sensor - STEMMA QT
- Adafruit Perma-Proto HAT for Pi Mini Kit - No EEPROM
- MCP3008 - 8-Channel 10-Bit ADC With SPI Interface
- Large Plastic Project Enclosure - Weatherproof with Clear Top
- SmallPlastic Project Enclosure - Weatherproof with Clear Top
- DIP Sockets Solder Tail - 16-Pin 0.3" x 1
- Weather Meter Kit
- Micro-HDMI to Standard HDMI 1M Cable
- SparkFun RJ11 Breakout
- RJ11 6-Pin Connector x 2
- 2 x 2m cable RJ14-RJ14 extension cord ( 4 conductor 6P4C) - Needed to extend cables
- 2 x RJ14 Socket to RJ14 Socket 6P4C Telephone Adapter
The main changes from the guide were:
- I used the 1 x sparkfun RJ11 breakout board with 2 x RJ11 6 pin connector for the two weather station RJ11 cables.
- The 3D printable mounts they reference in the guide do not fit the Adafruit boxes purchased, so I designed something up and printed it.
- At this stage, I have not installed the air quality sensor and DS18B20 probe.
Links:
The following guides helped me get through this project, if you are setting out to build your own Pi Weather Station, check them out:
Steps:
You can use an IOS app called PWS Monitor to also view your data. Here is screenshot,

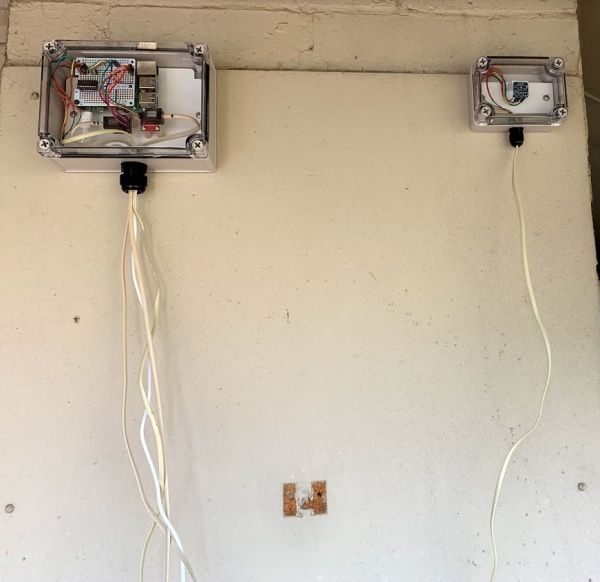
This is the final project mounted to the roof.

Larger box holds the rPi and smaller box holds the BME280. Cable management needs some work !
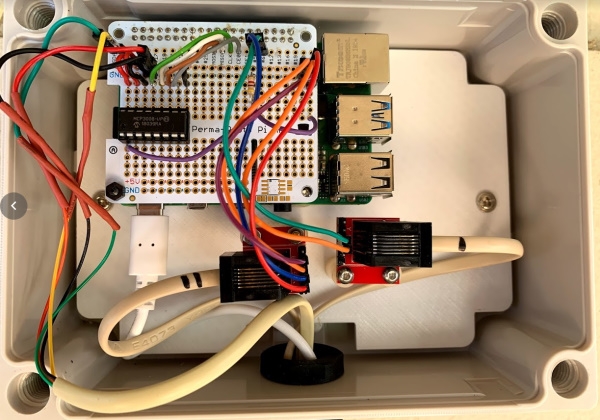
rPi and RJ11 breakouts
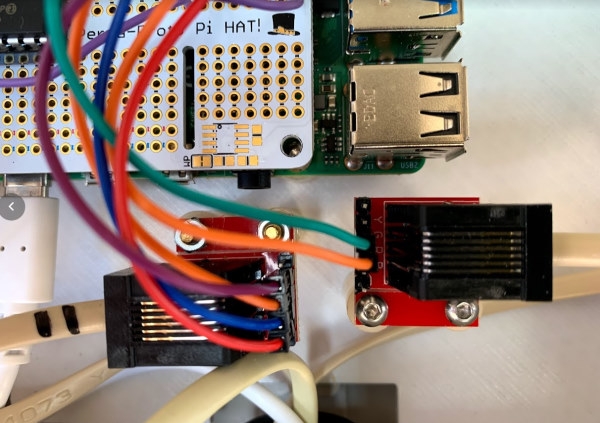
rPi / RJ11 breakout closeup
The BME Sensor box

Wiring diagram for connecting the BME Sensor

The BME280 was fully enclosed in the small enclosure. The values were not so accurate (especially the humidity) as the sensor should be exposed to the environment. I drilled some holes in the box and glued some flyscreen over the holes to stop the spiders. I also painted the PCB with some clear nailpolish ( acts as a conformal coating). I did not paint over the bosch sensor though!

Still have To Do:
- Tidy up the cables !
- If the raspberry pi loses connection (I am using wifi), then the python program crashes as the upload to WU fails. I need to handle this without the program crashing!
- The rainfall is not retentive and is lost on power down or when I stop the program. Would like the value to be saved.
- Need to record rainfall over 24 hr period and reset at midnight.
Issues:
As you can see in the photos I used jumper wires from the rPi to the RJ11 boards and to the BME280. I found often the female end falls off as it is not a tight fit on the pin. These were purchased from a cheap ebay supplier so I would probably research a better alternative. In some instances I removed the black end and squeezed the female end a bit to make a tighter fit.

